Setup:
Today I am going to create a bangle or two. I’m experimenting with color swirls in resin. My previous attempt using dye swirled into pendant resin molds resulted in areas where the resin did not cure completely. To remedy the curing problem I’ll try mixing the dye with a bit of resin separated from the main batch.
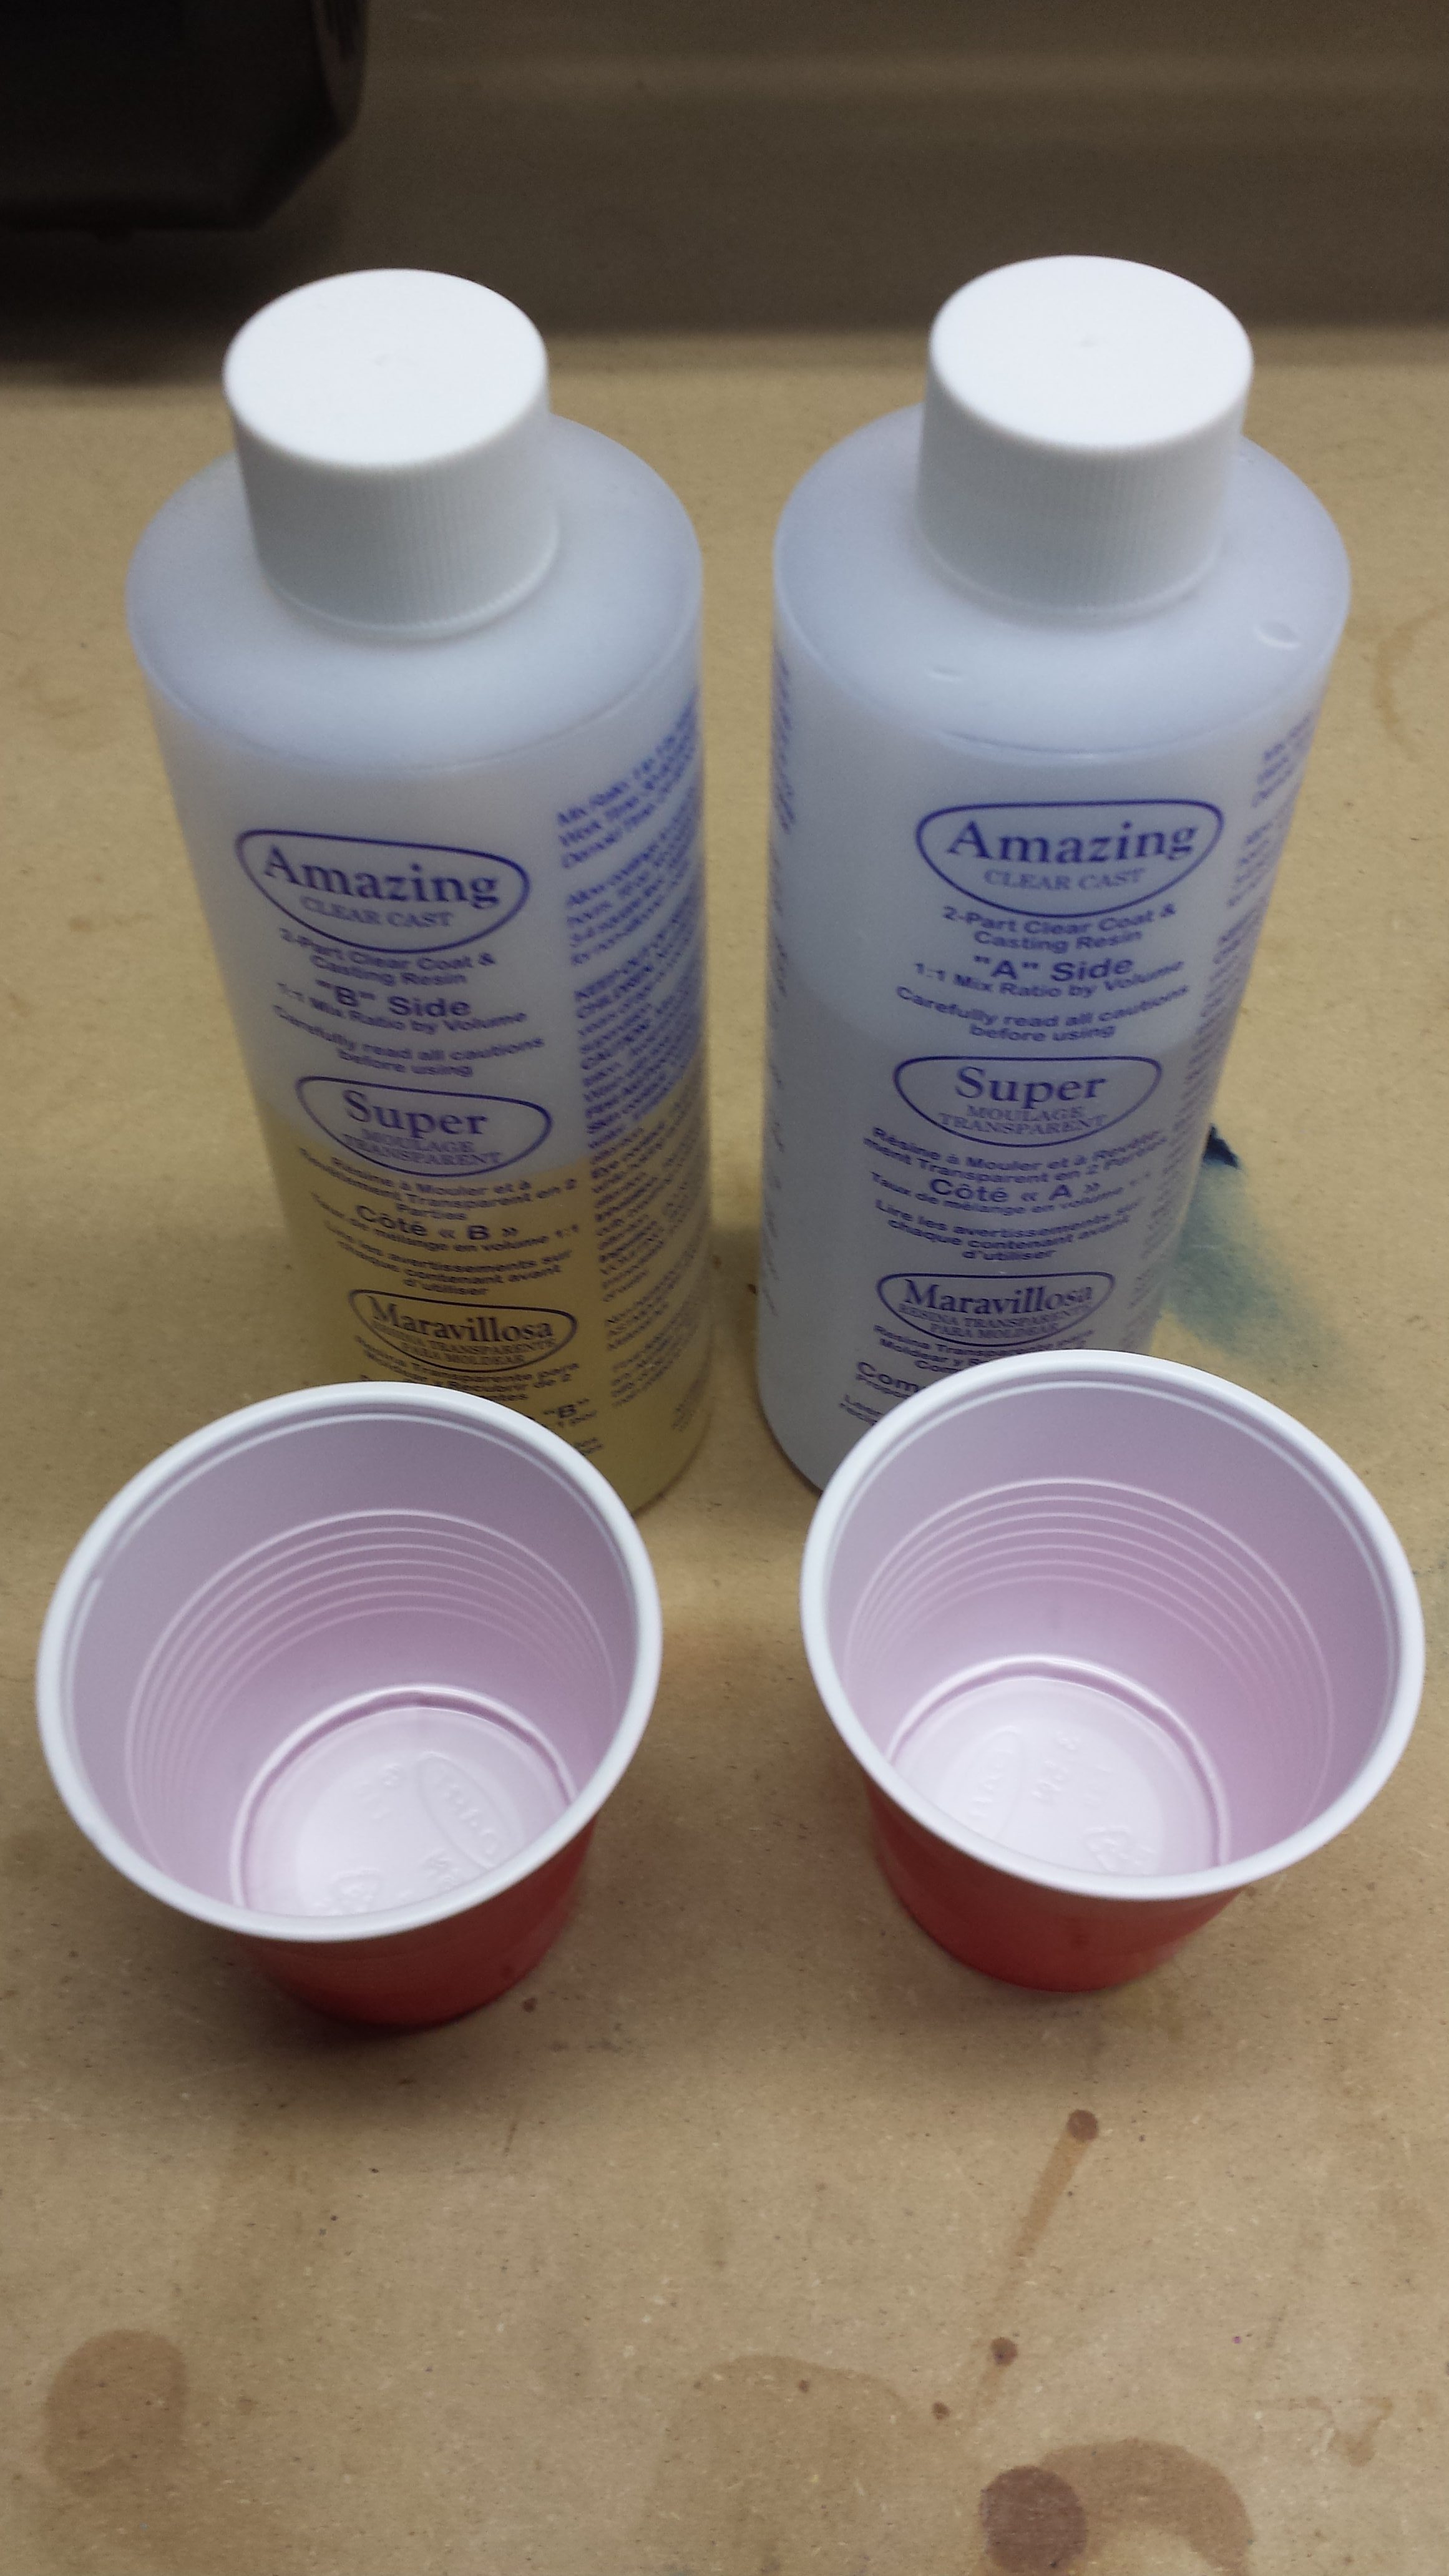
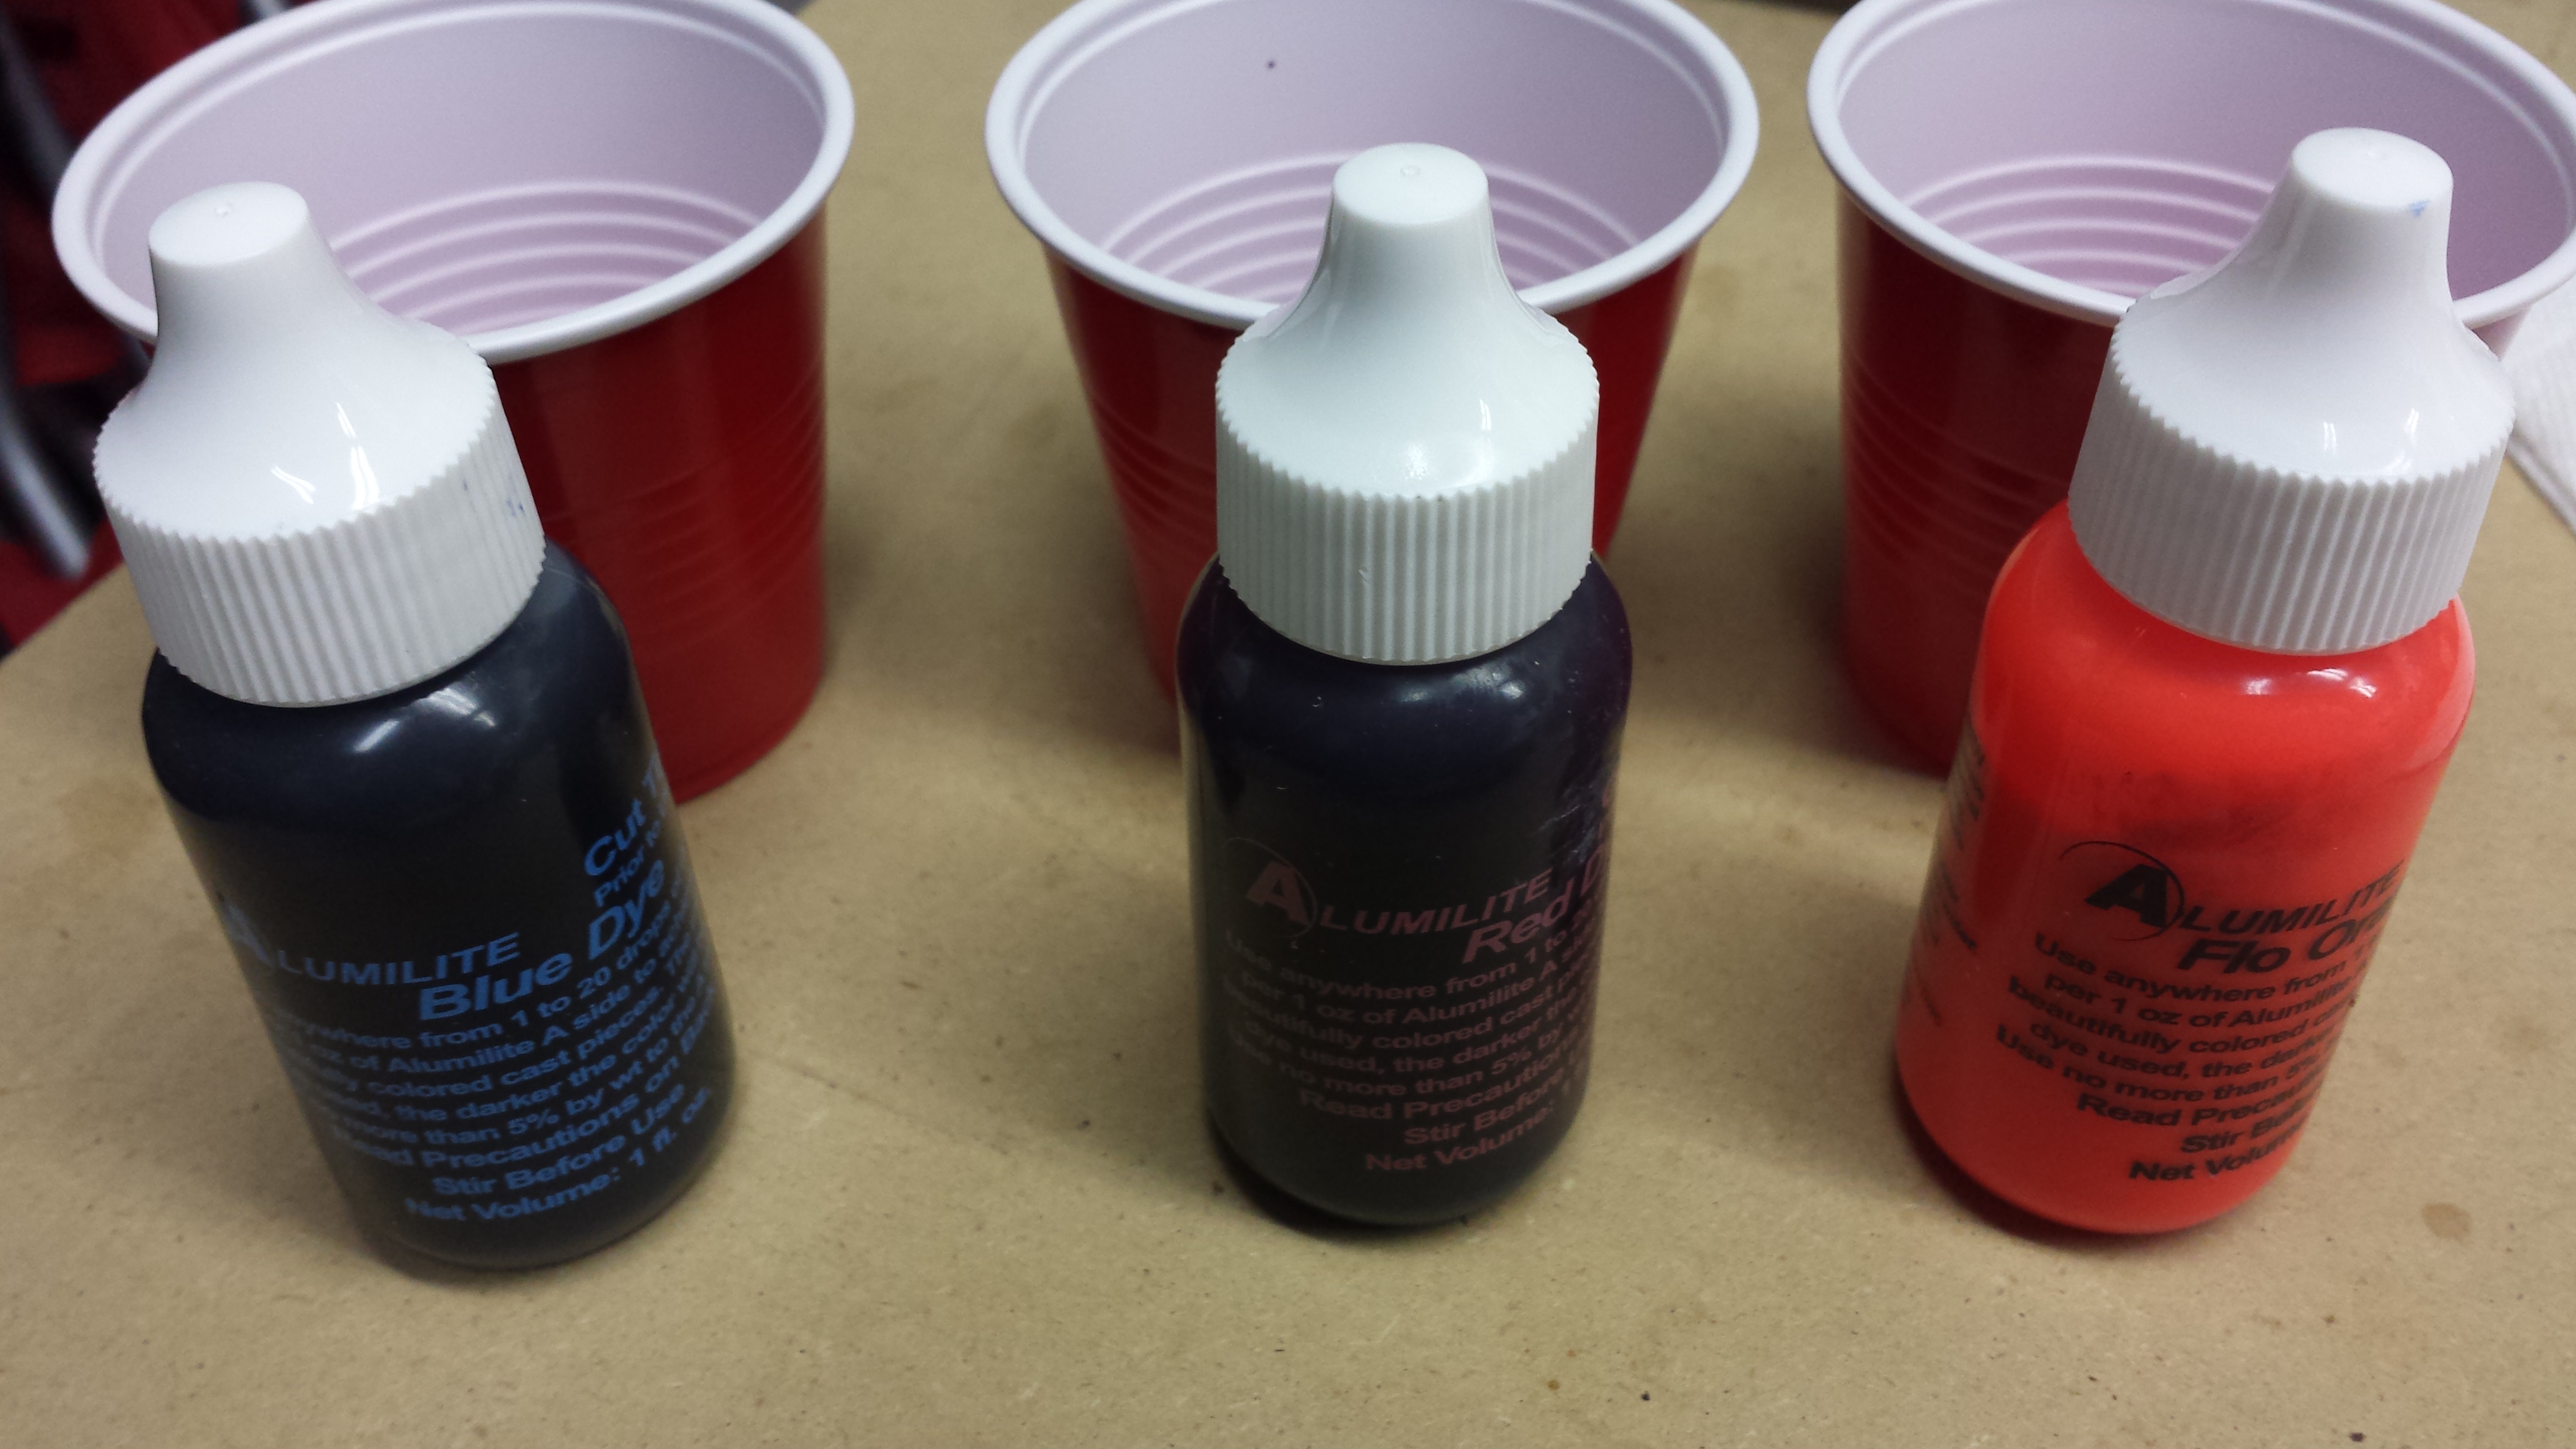
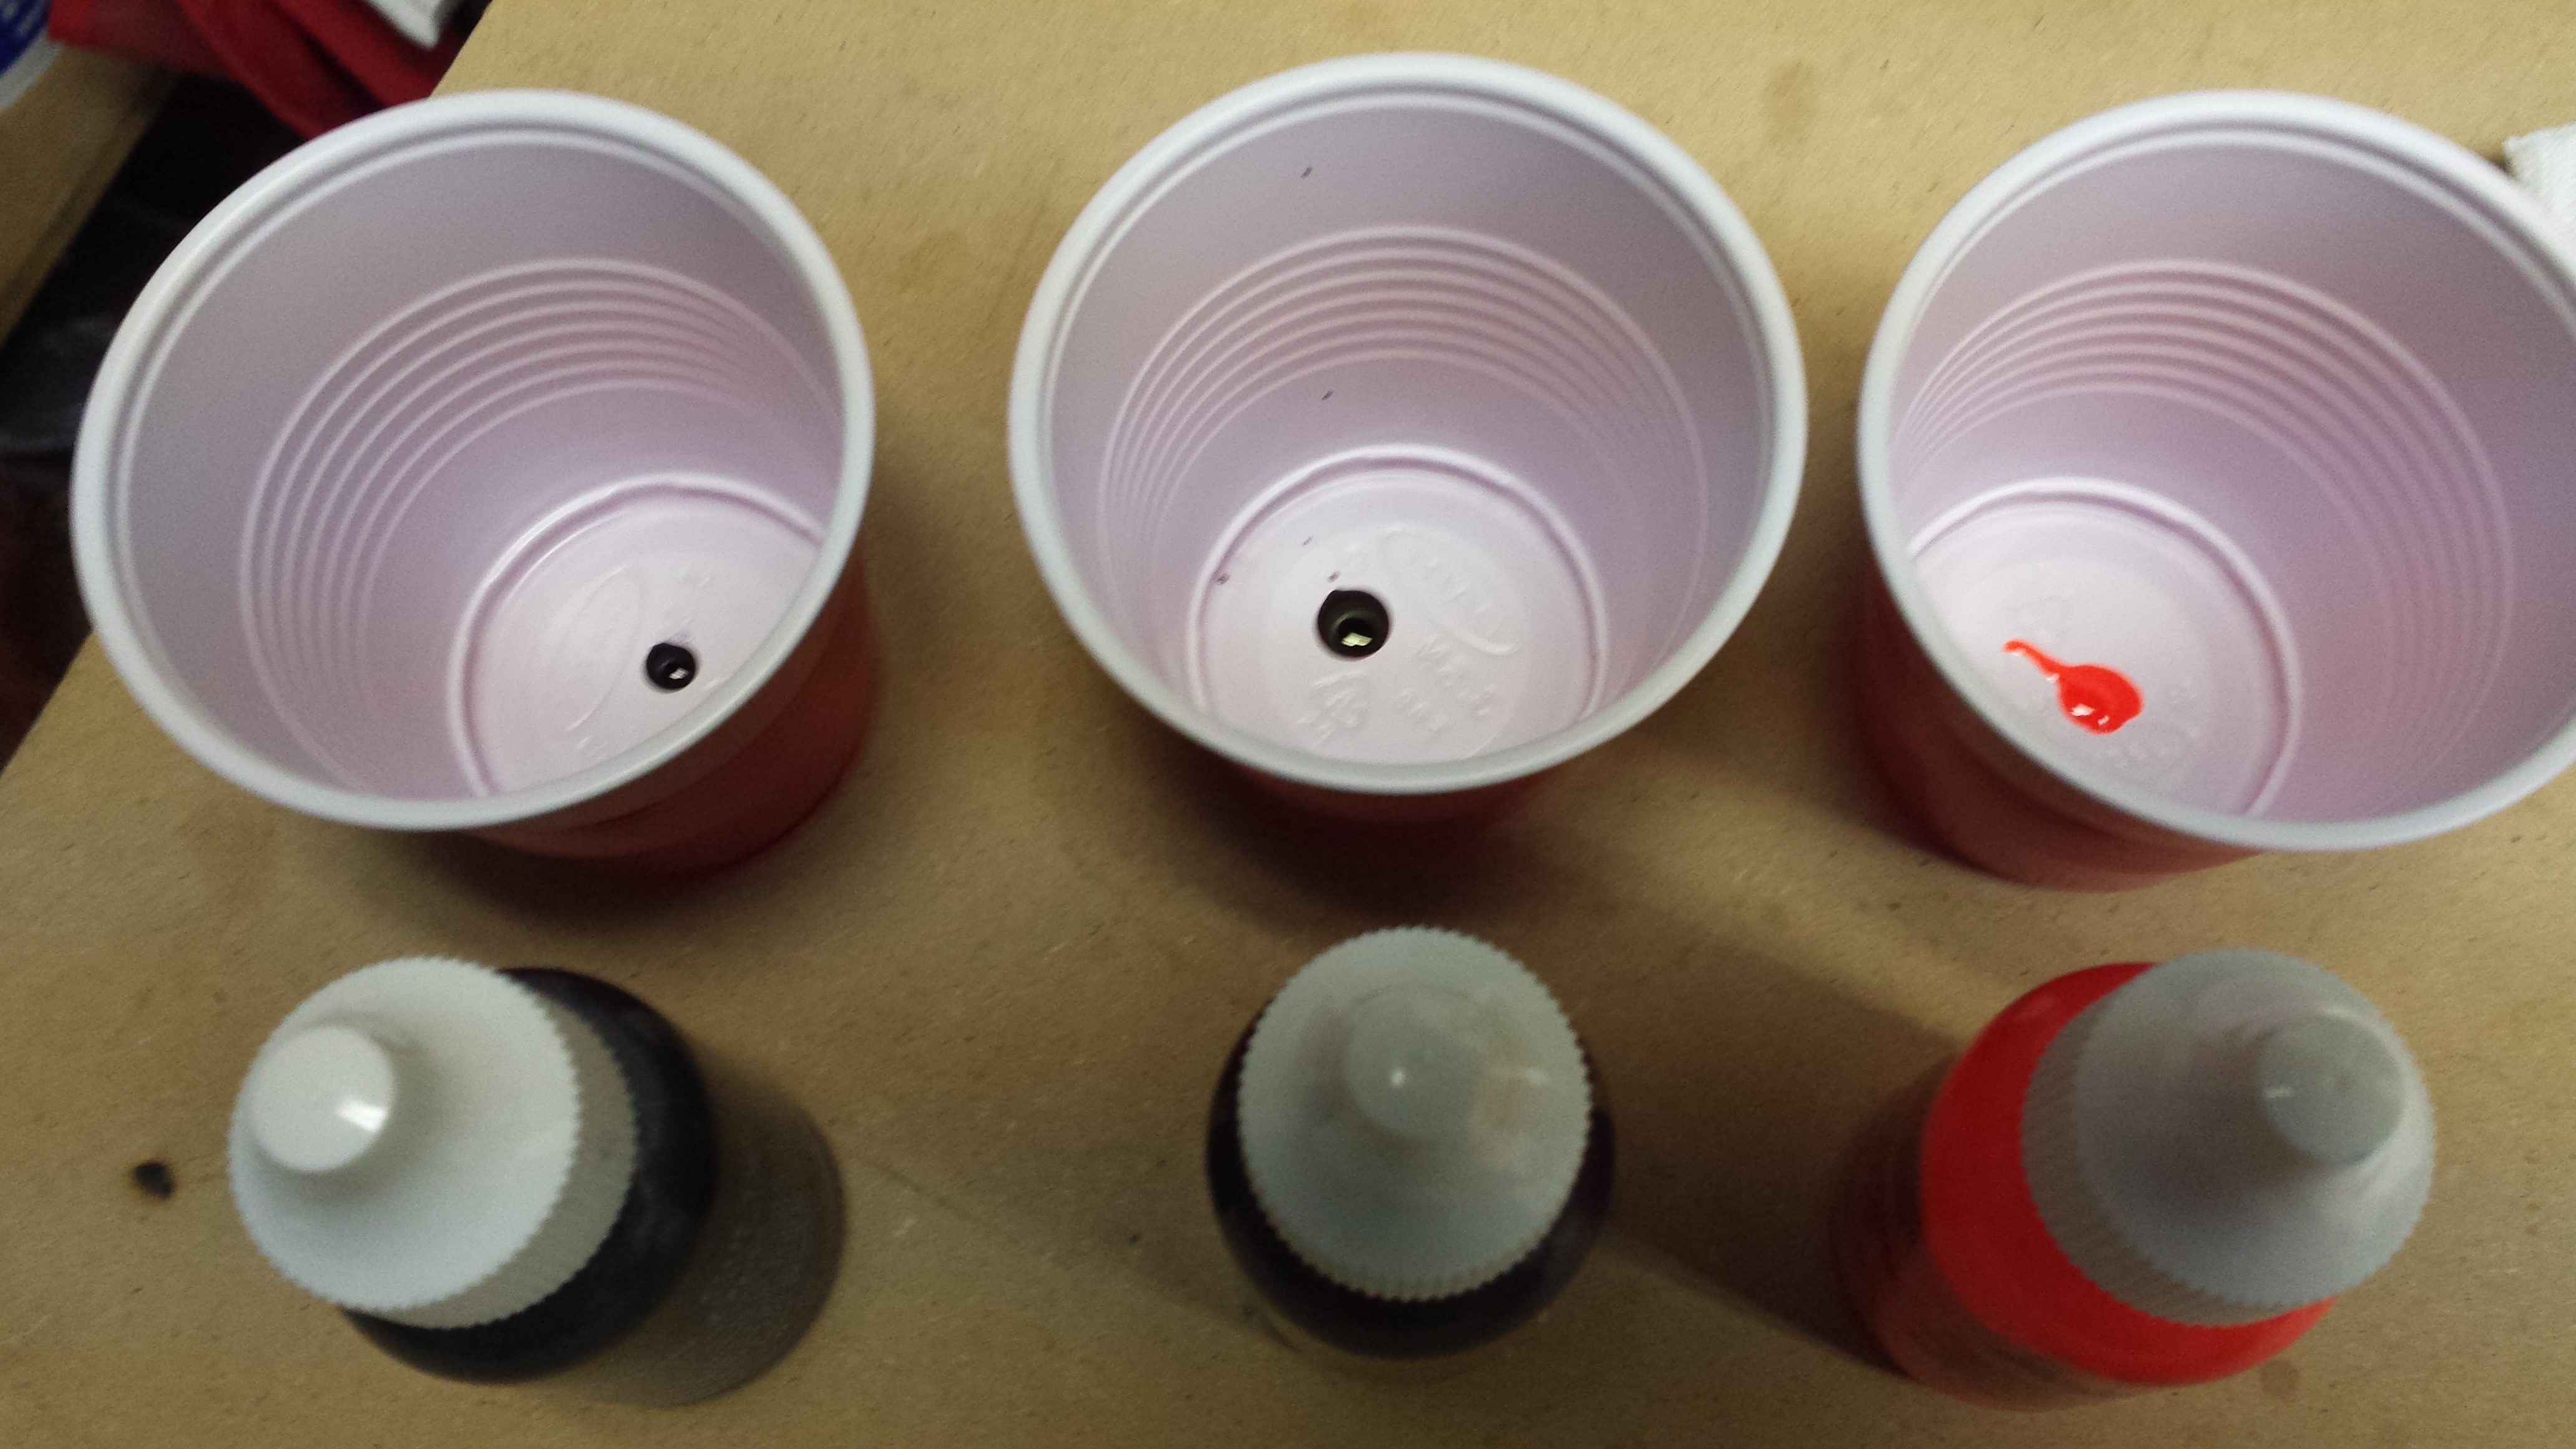
I’m using Alumilute Amazing Clear Cast resin, due to it’s longer open time, and I’ll use dyes from the same manufacturer. I selected three Alumilite dyes blue, red, and flo orange. Placing one drop of each color in the bottom of the mixing cups I then pouring a small amount of mixed resin into each cup. I’ll pour clear resin into the mold first to give me something to drag the colored resin through.
 I filled my two warmed bangle molds with clear resin. Then, using a toothpick, I swirled some of the colored resin throughout the mold. I topped each mold off with a bit of extra resin to counter shrinkage. Then placed them in the pressure pot to set overnight. Before removing the bangles from the molds I forgot to get pictures.
Bangle Demold:
When I popped the bangles out of the molds they came shiny and smooth with minimal flashing. I trimmed the flashing off with a utility knife. I overfilled the molds slightly to avoid shrinkage, but, as with my previous attempt there is still a significant concavity at the top of each bangle. I’ll have to research why this is happening. We’ll see what it looks like after I’ve sanded and polished them.
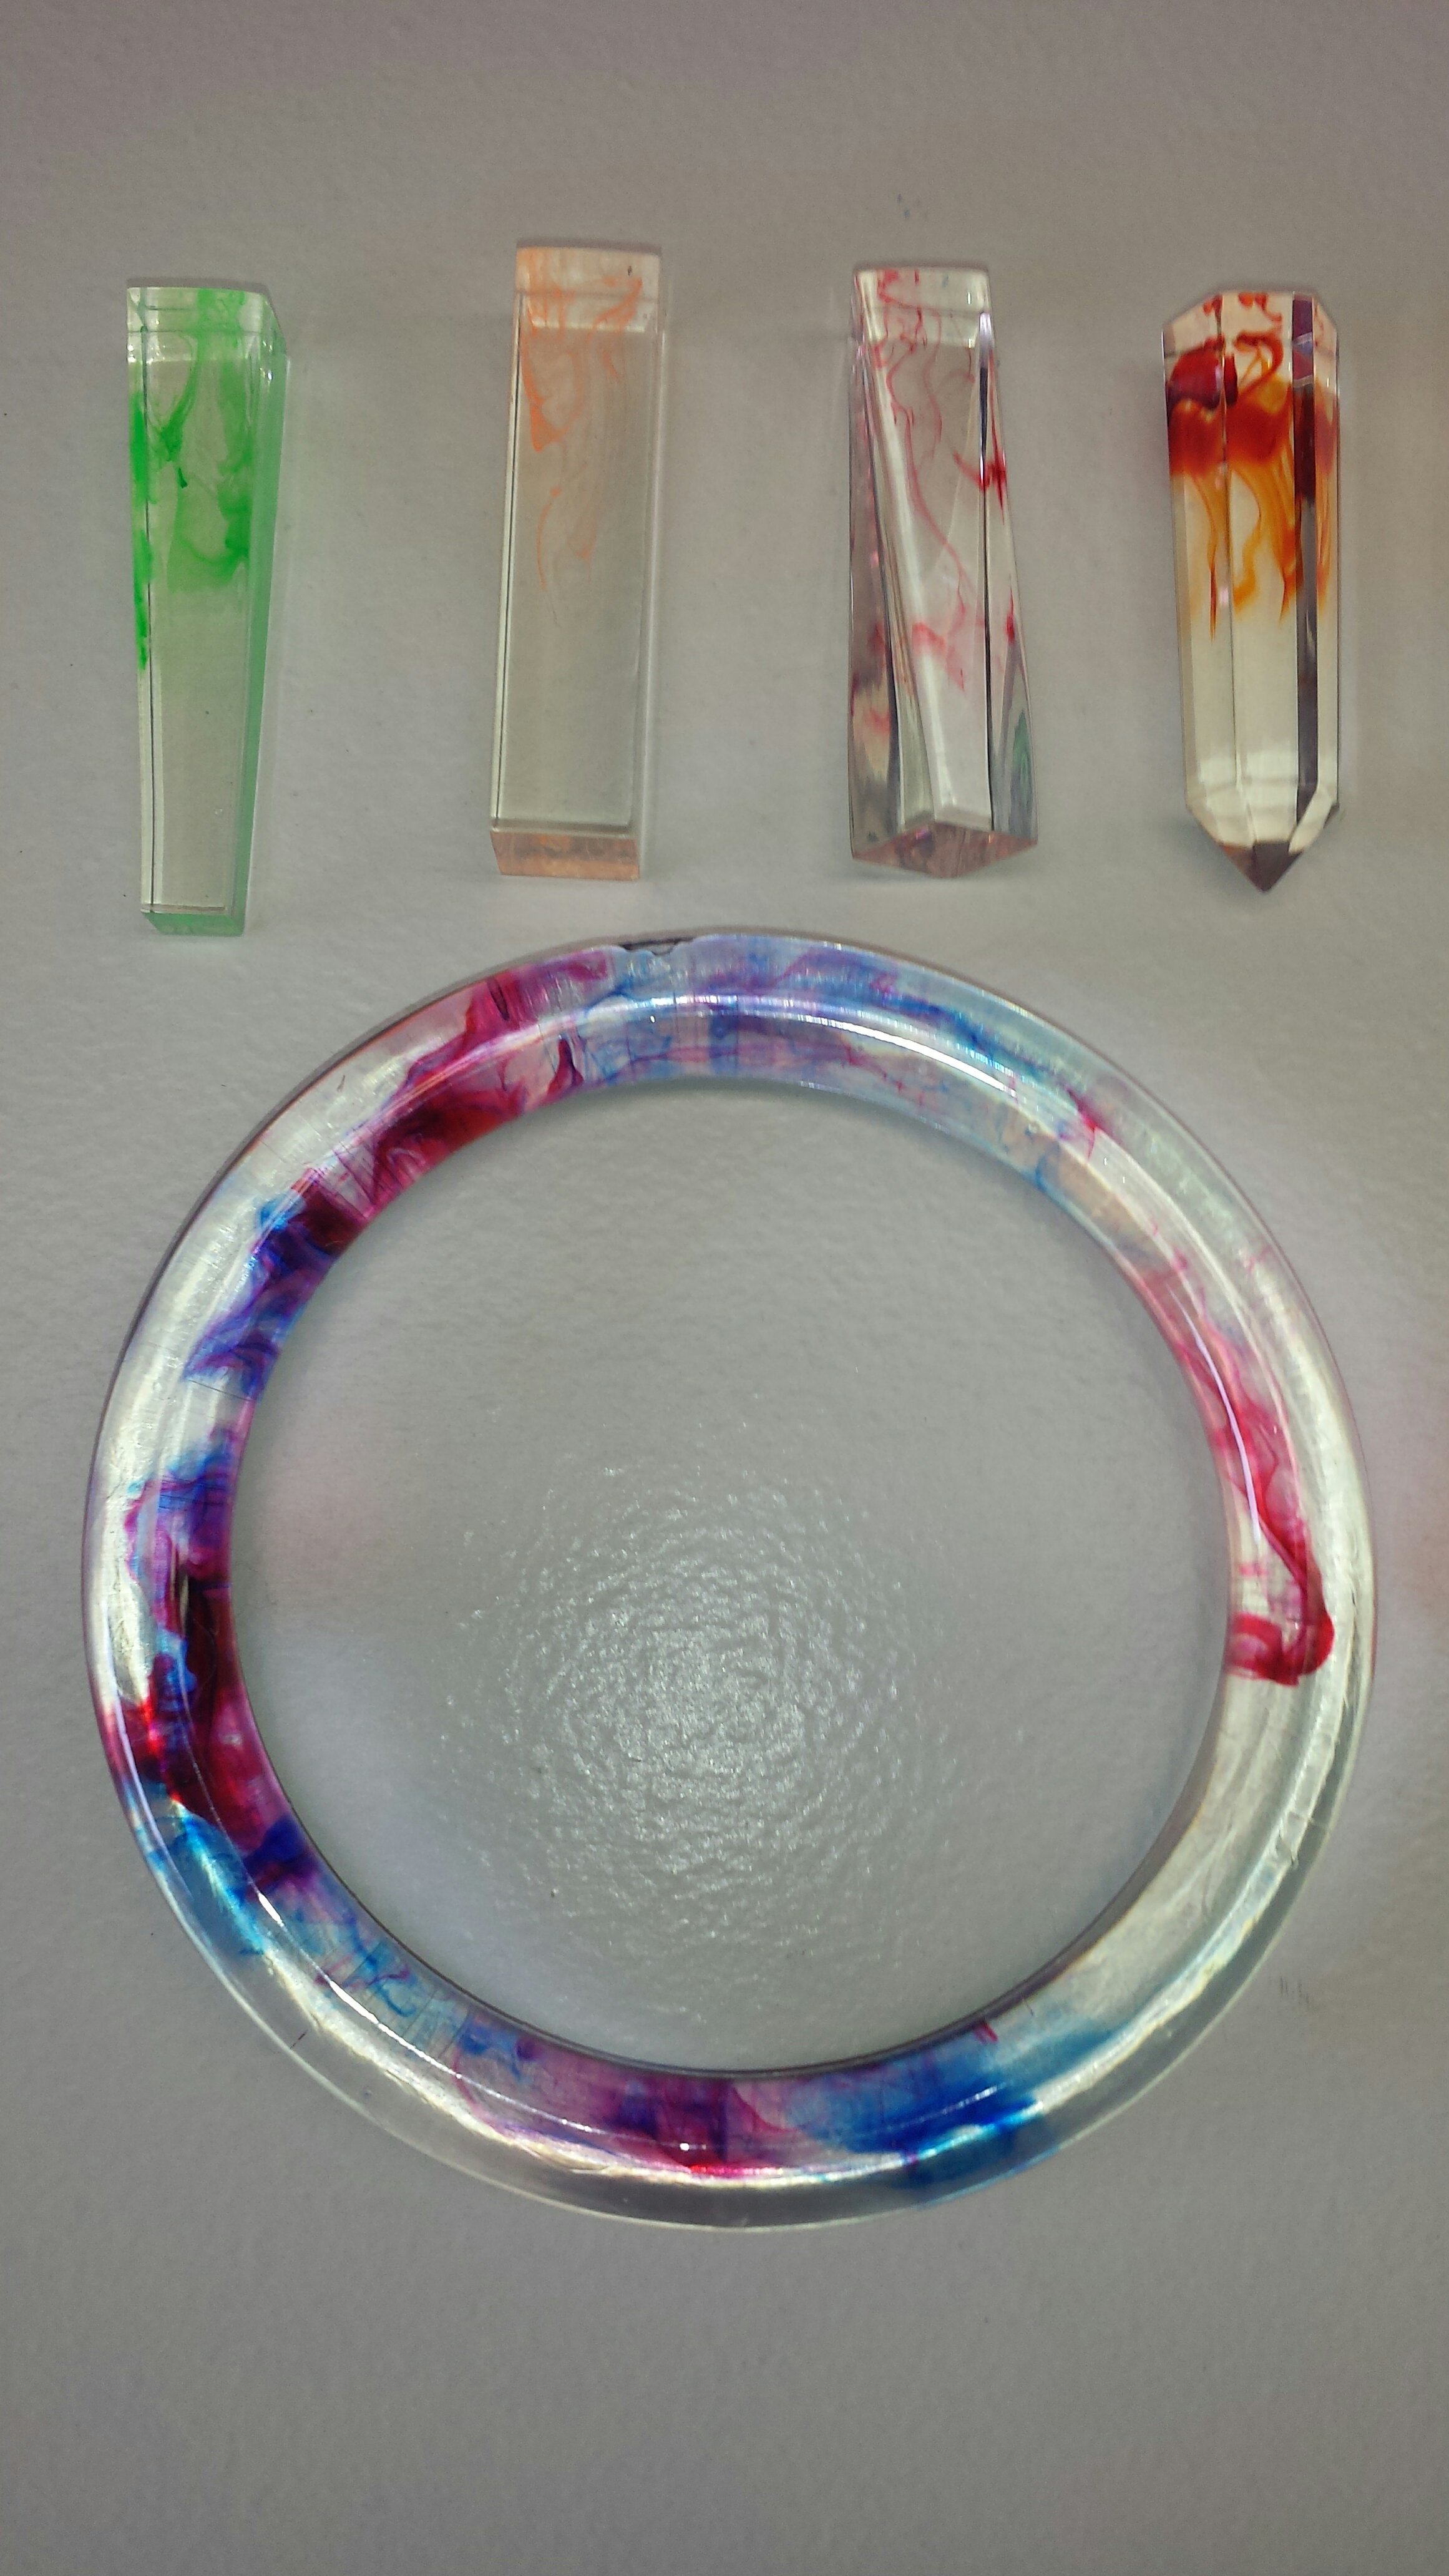
Here are the red and blue bangle as well as a few pendants after sanding. I wet sanded them to 600 grit with strips of conventional cloth backed sandpaper. Then, I continued wet sanding from 1500 to 12000 using Micro Mesh pads. The next step is to polish them. I selected Novus plastic polishes as I haven’t used them before and this is an experiment after all. The polish is applied then buffed off with a soft lint-free cloth.
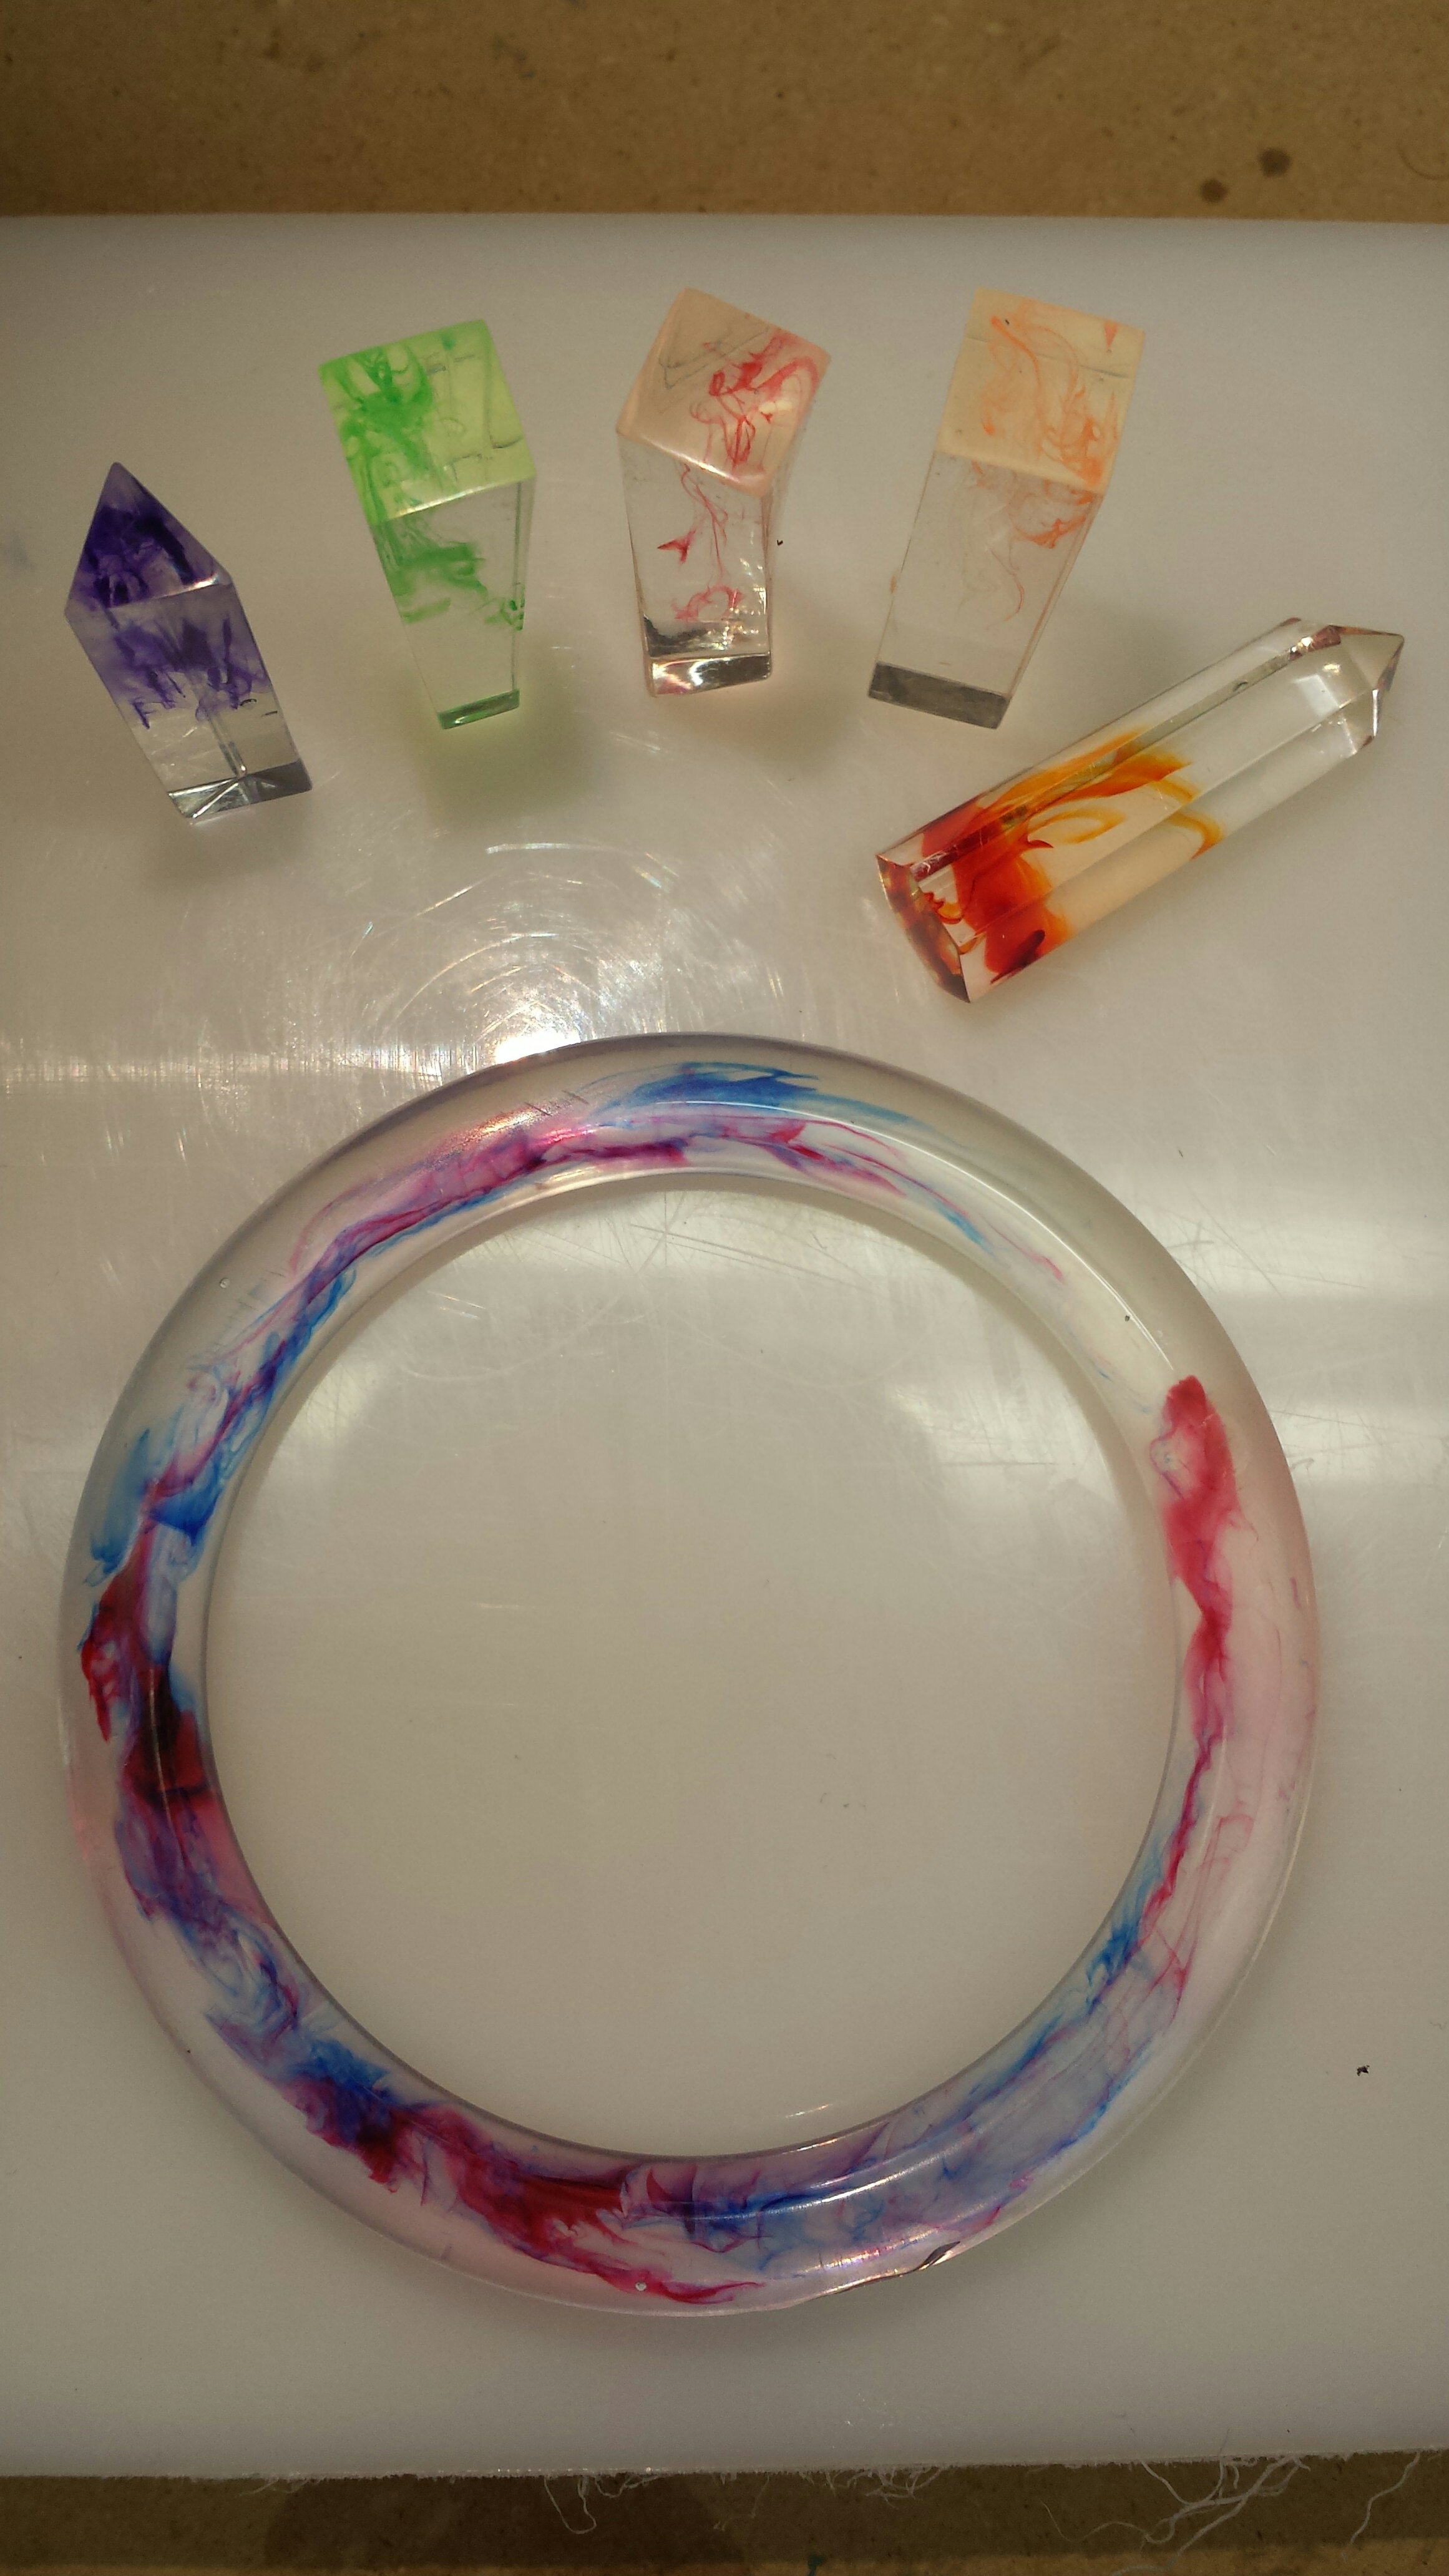
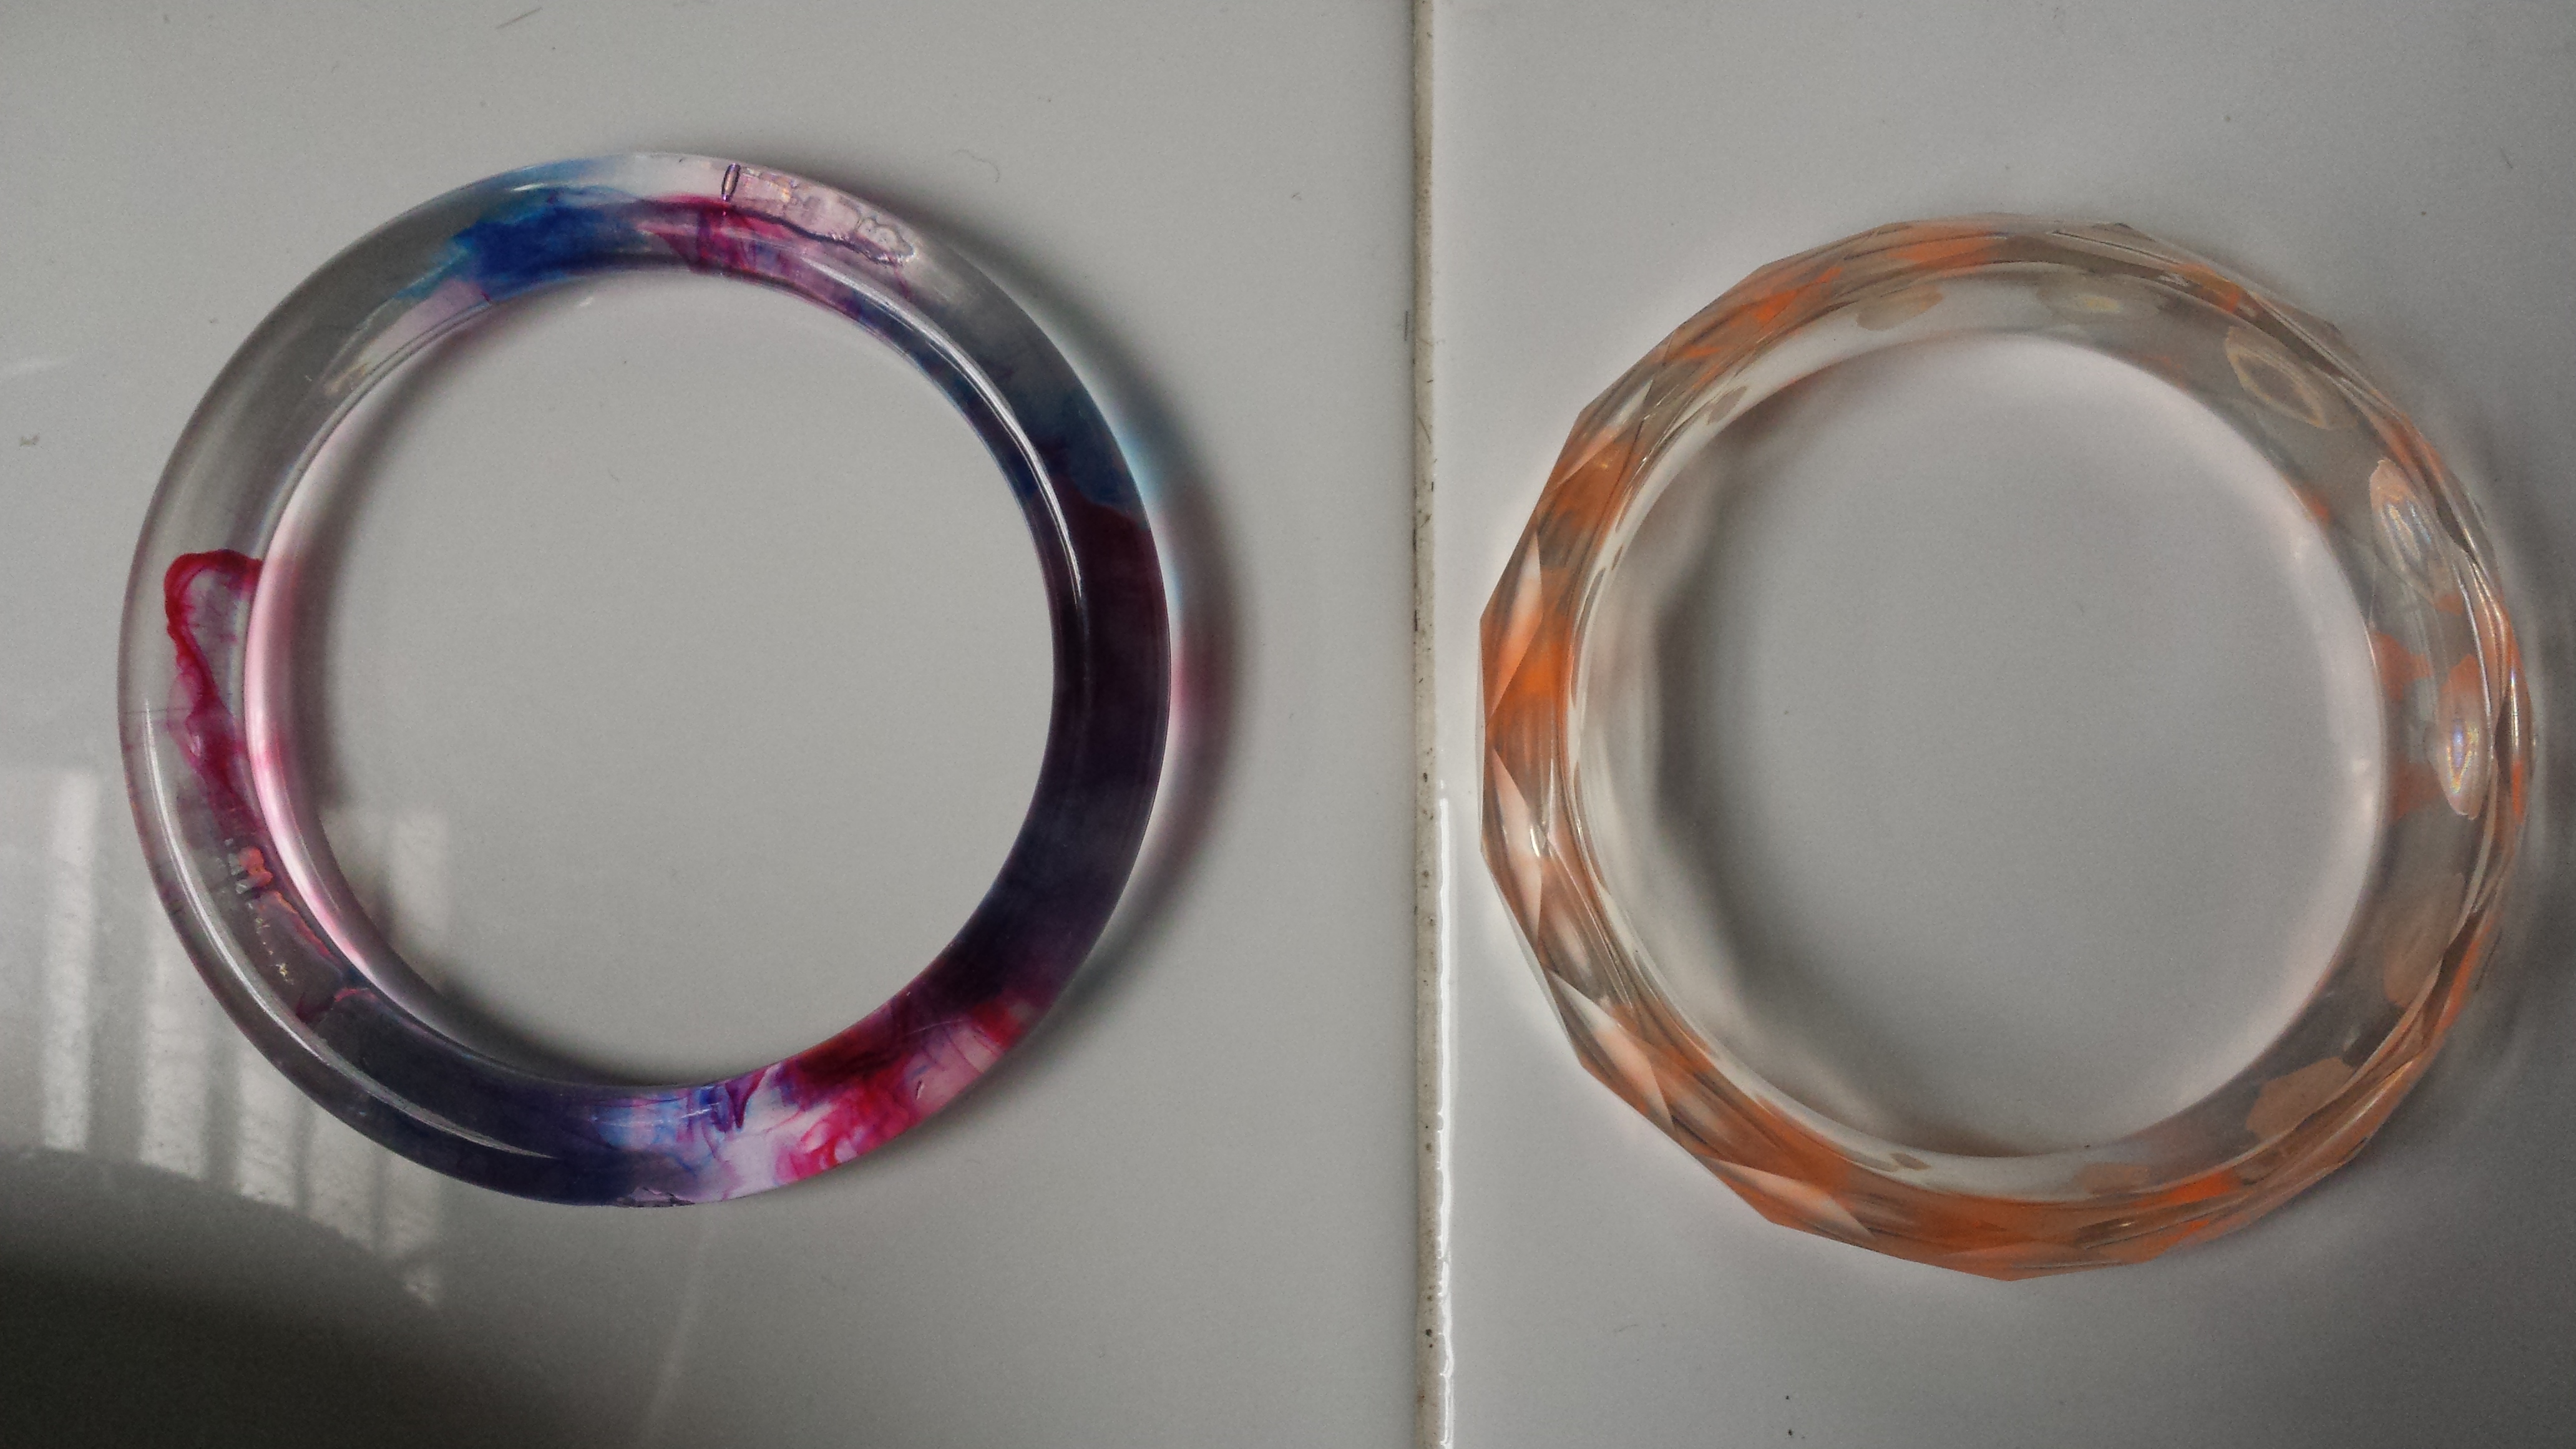
Here is a picture after final buffing. I’m very happy with the results of the sanding and polishing. My technique for casting still needs work but that’s why we practice, right?