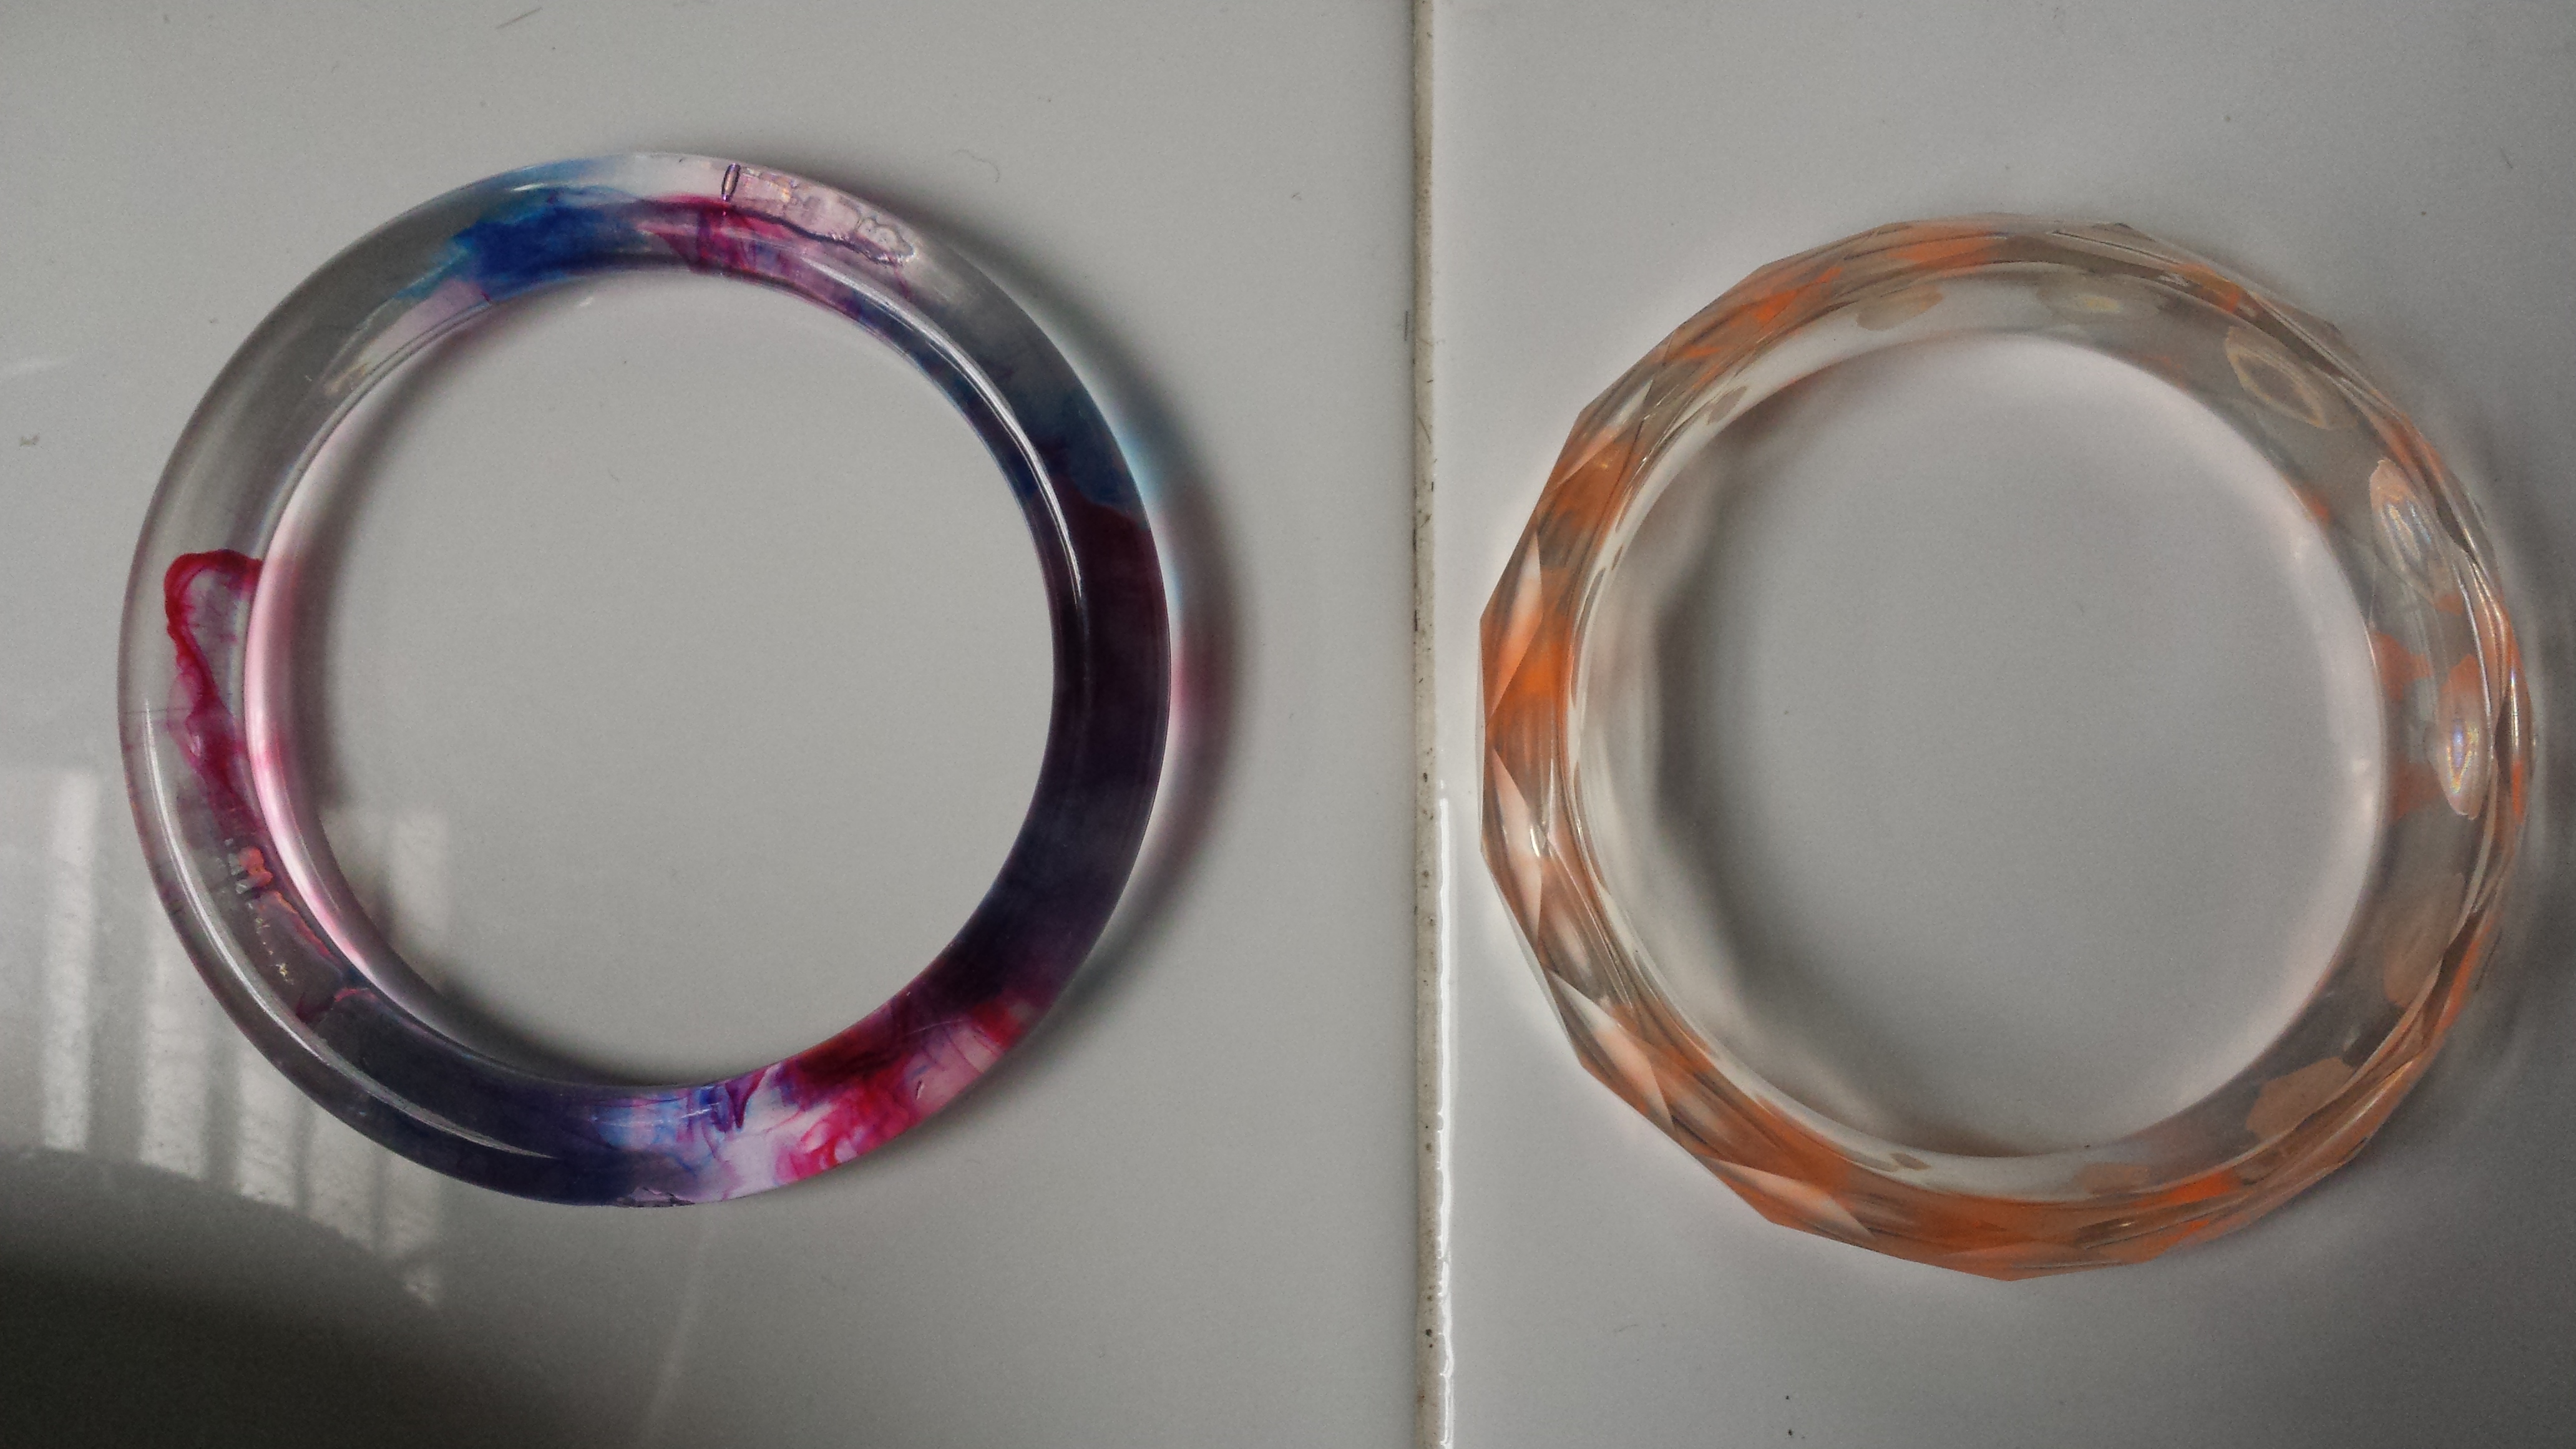
Today I am going to create a bangle or two. I’m experimenting with color swirls in resin. My previous attempt using dye swirled into pendant resin molds resulted in areas where the resin did not cure completely. To remedy the curing problem I’ll try mixing the dye with a bit of resin separated from the main batch.Continue reading “20170506 – Bangle Color Swirl Experiment”
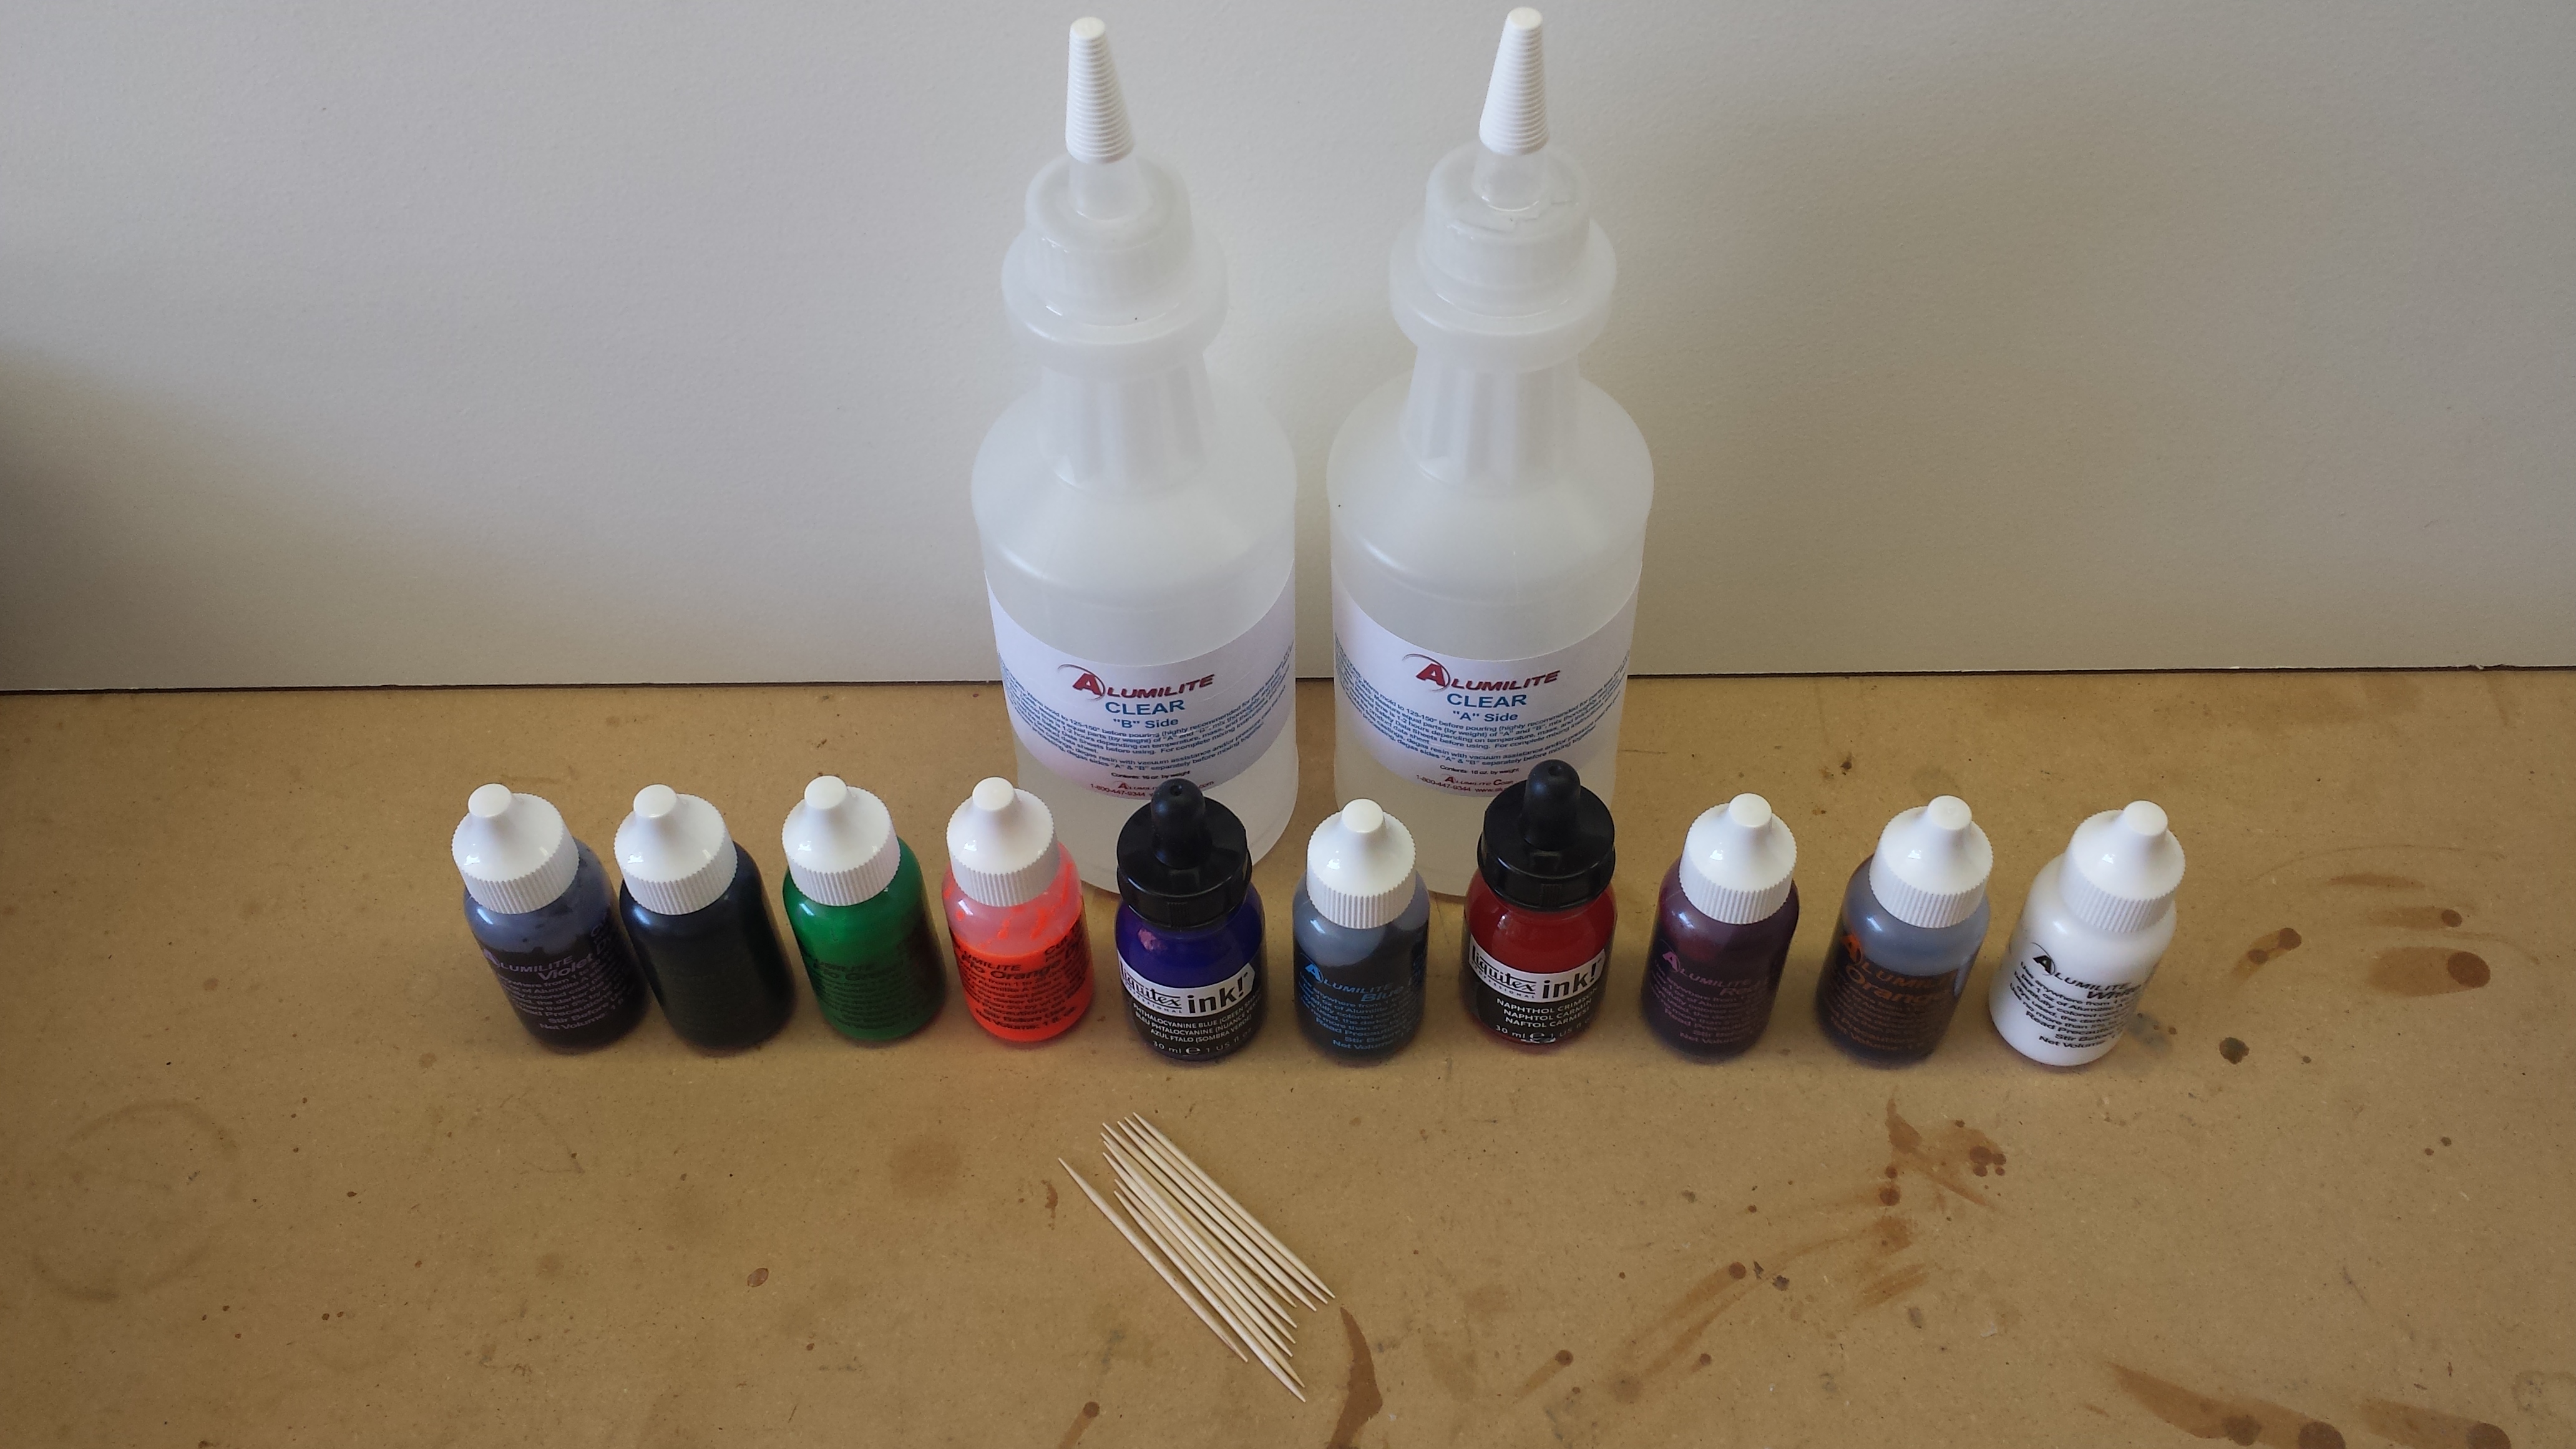
Alumilite Clear, Alumilite dyes, and Liquitex alcohol inks.
I’m working on resin pendants with color wisps today. Using Alumilite clear and Alumilite dyes. I’m also going to test out two Liquitex alcohol inks. This will be my first pour using these silicone pendant molds from Mtlee that I found on Amazon.com. Continue reading “20170429 – First Attempt with Resin Pendants”
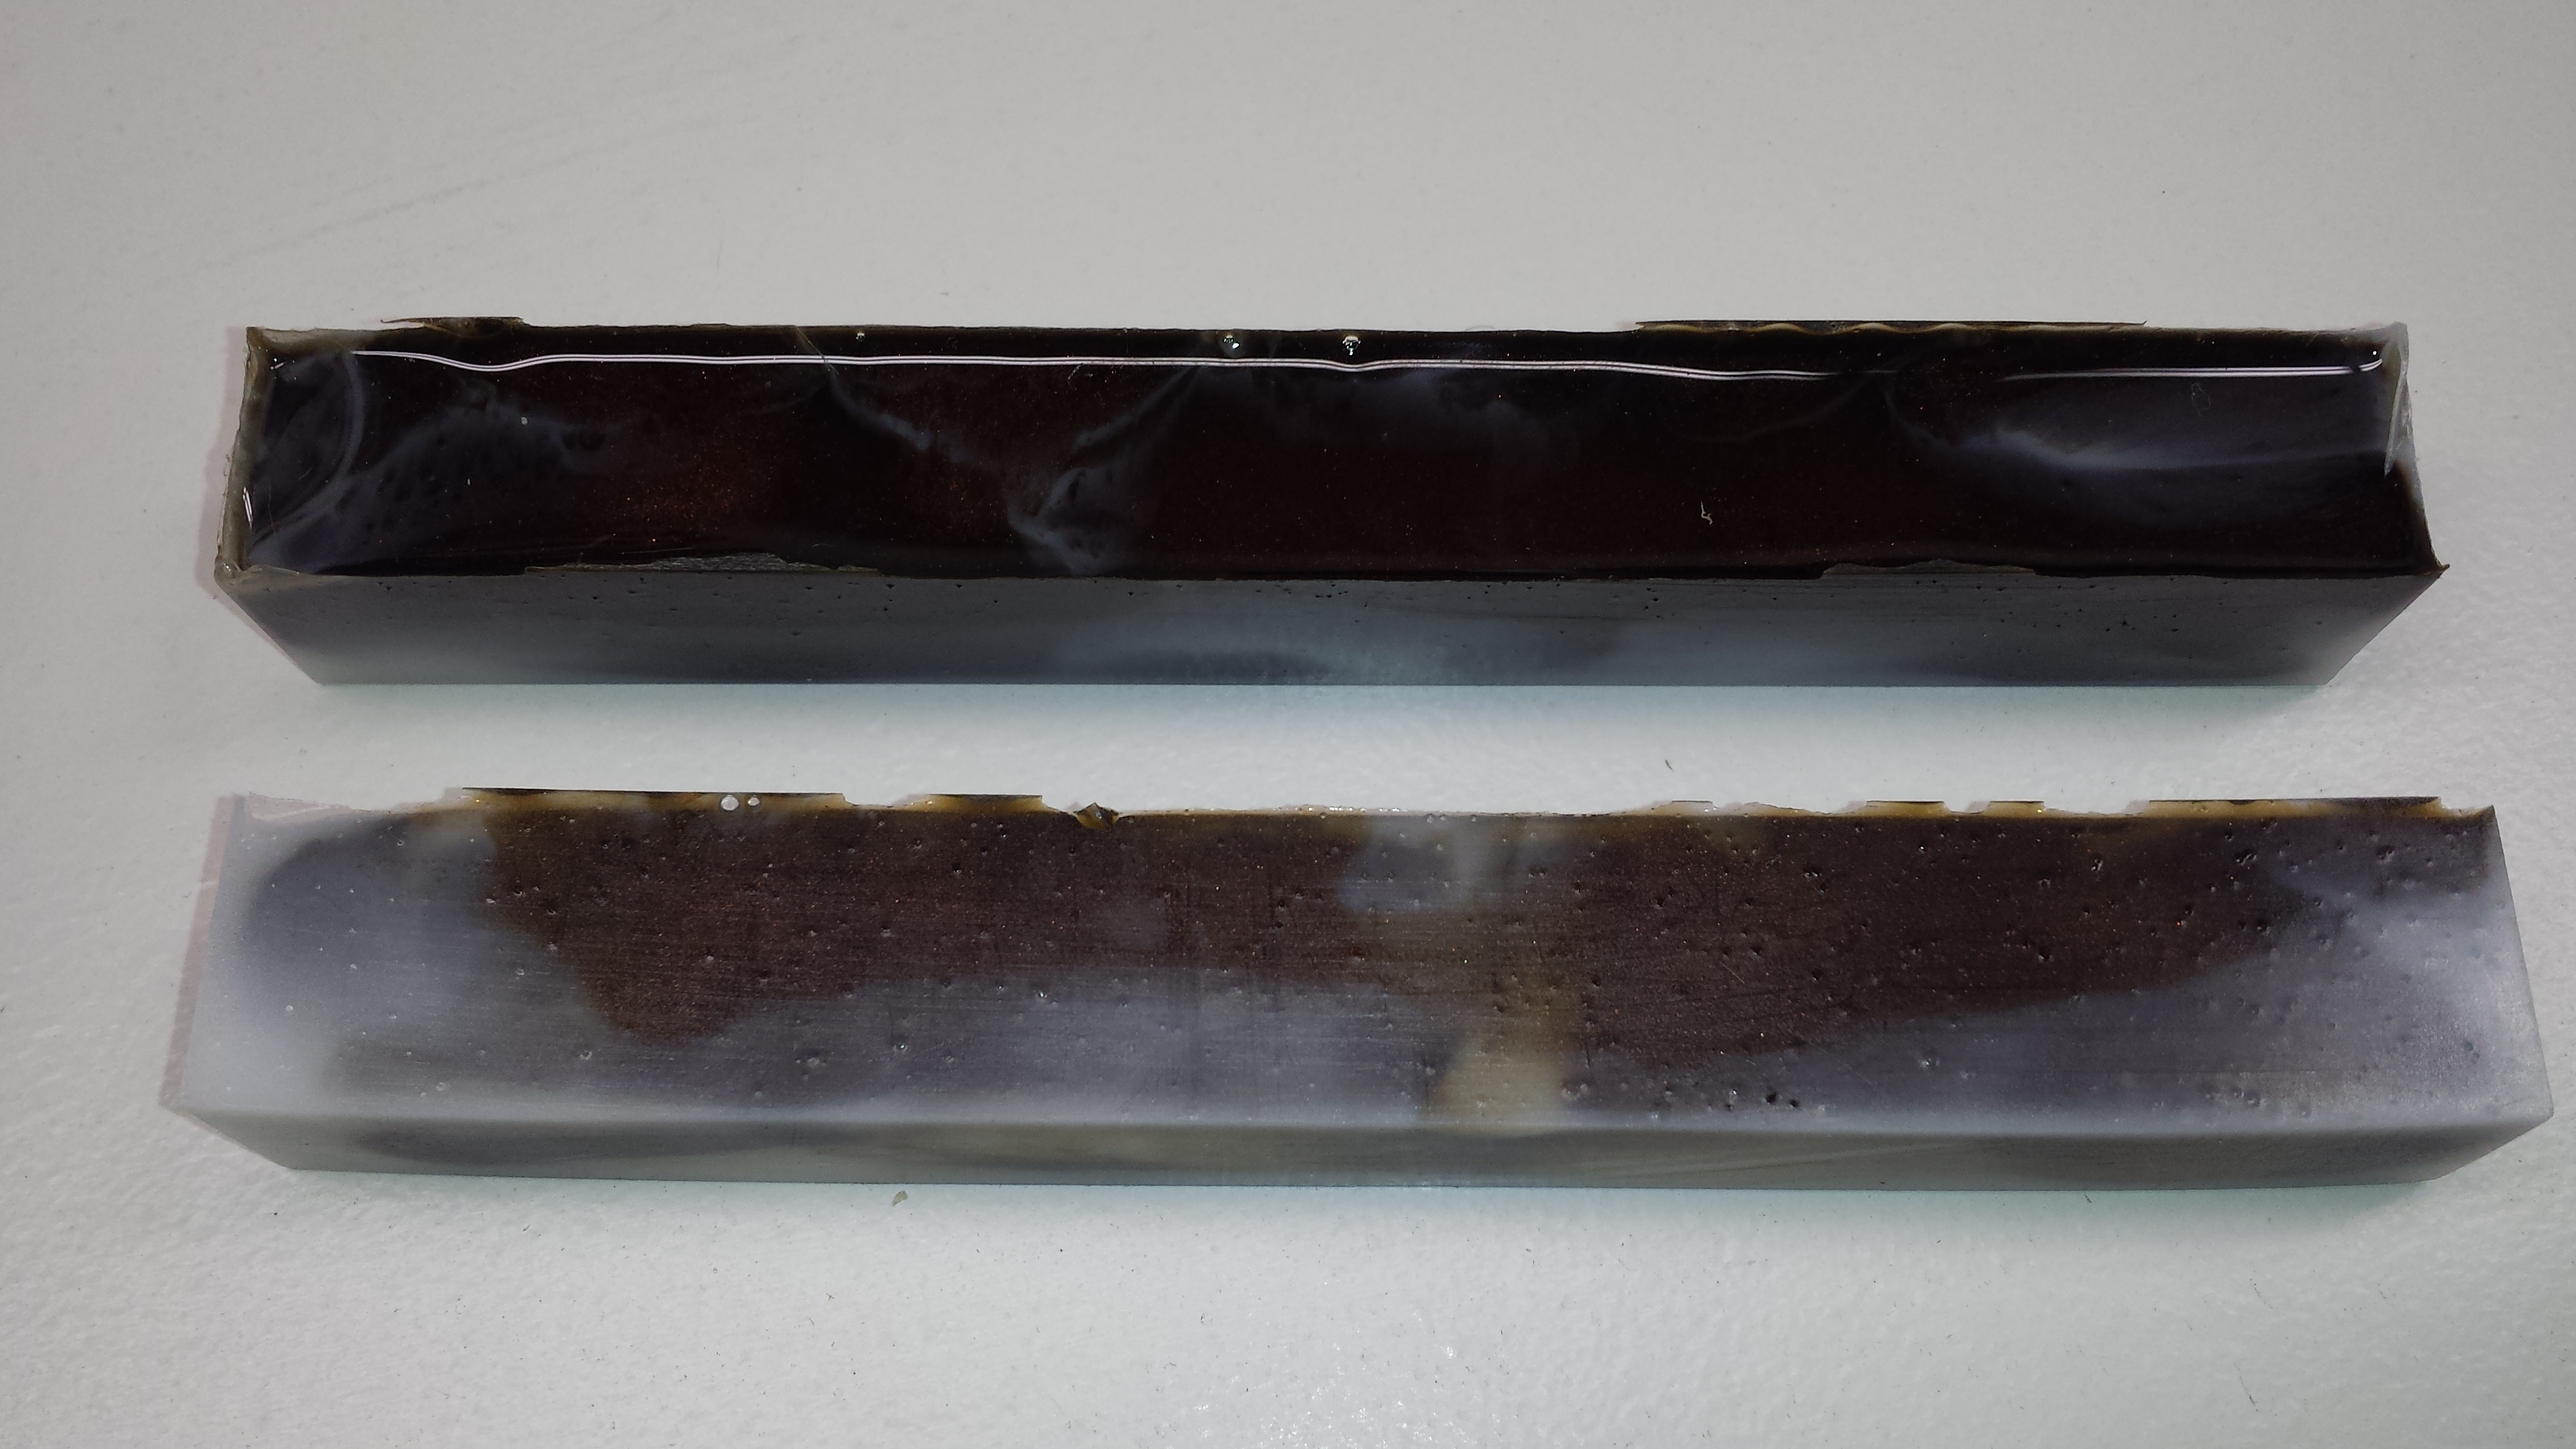
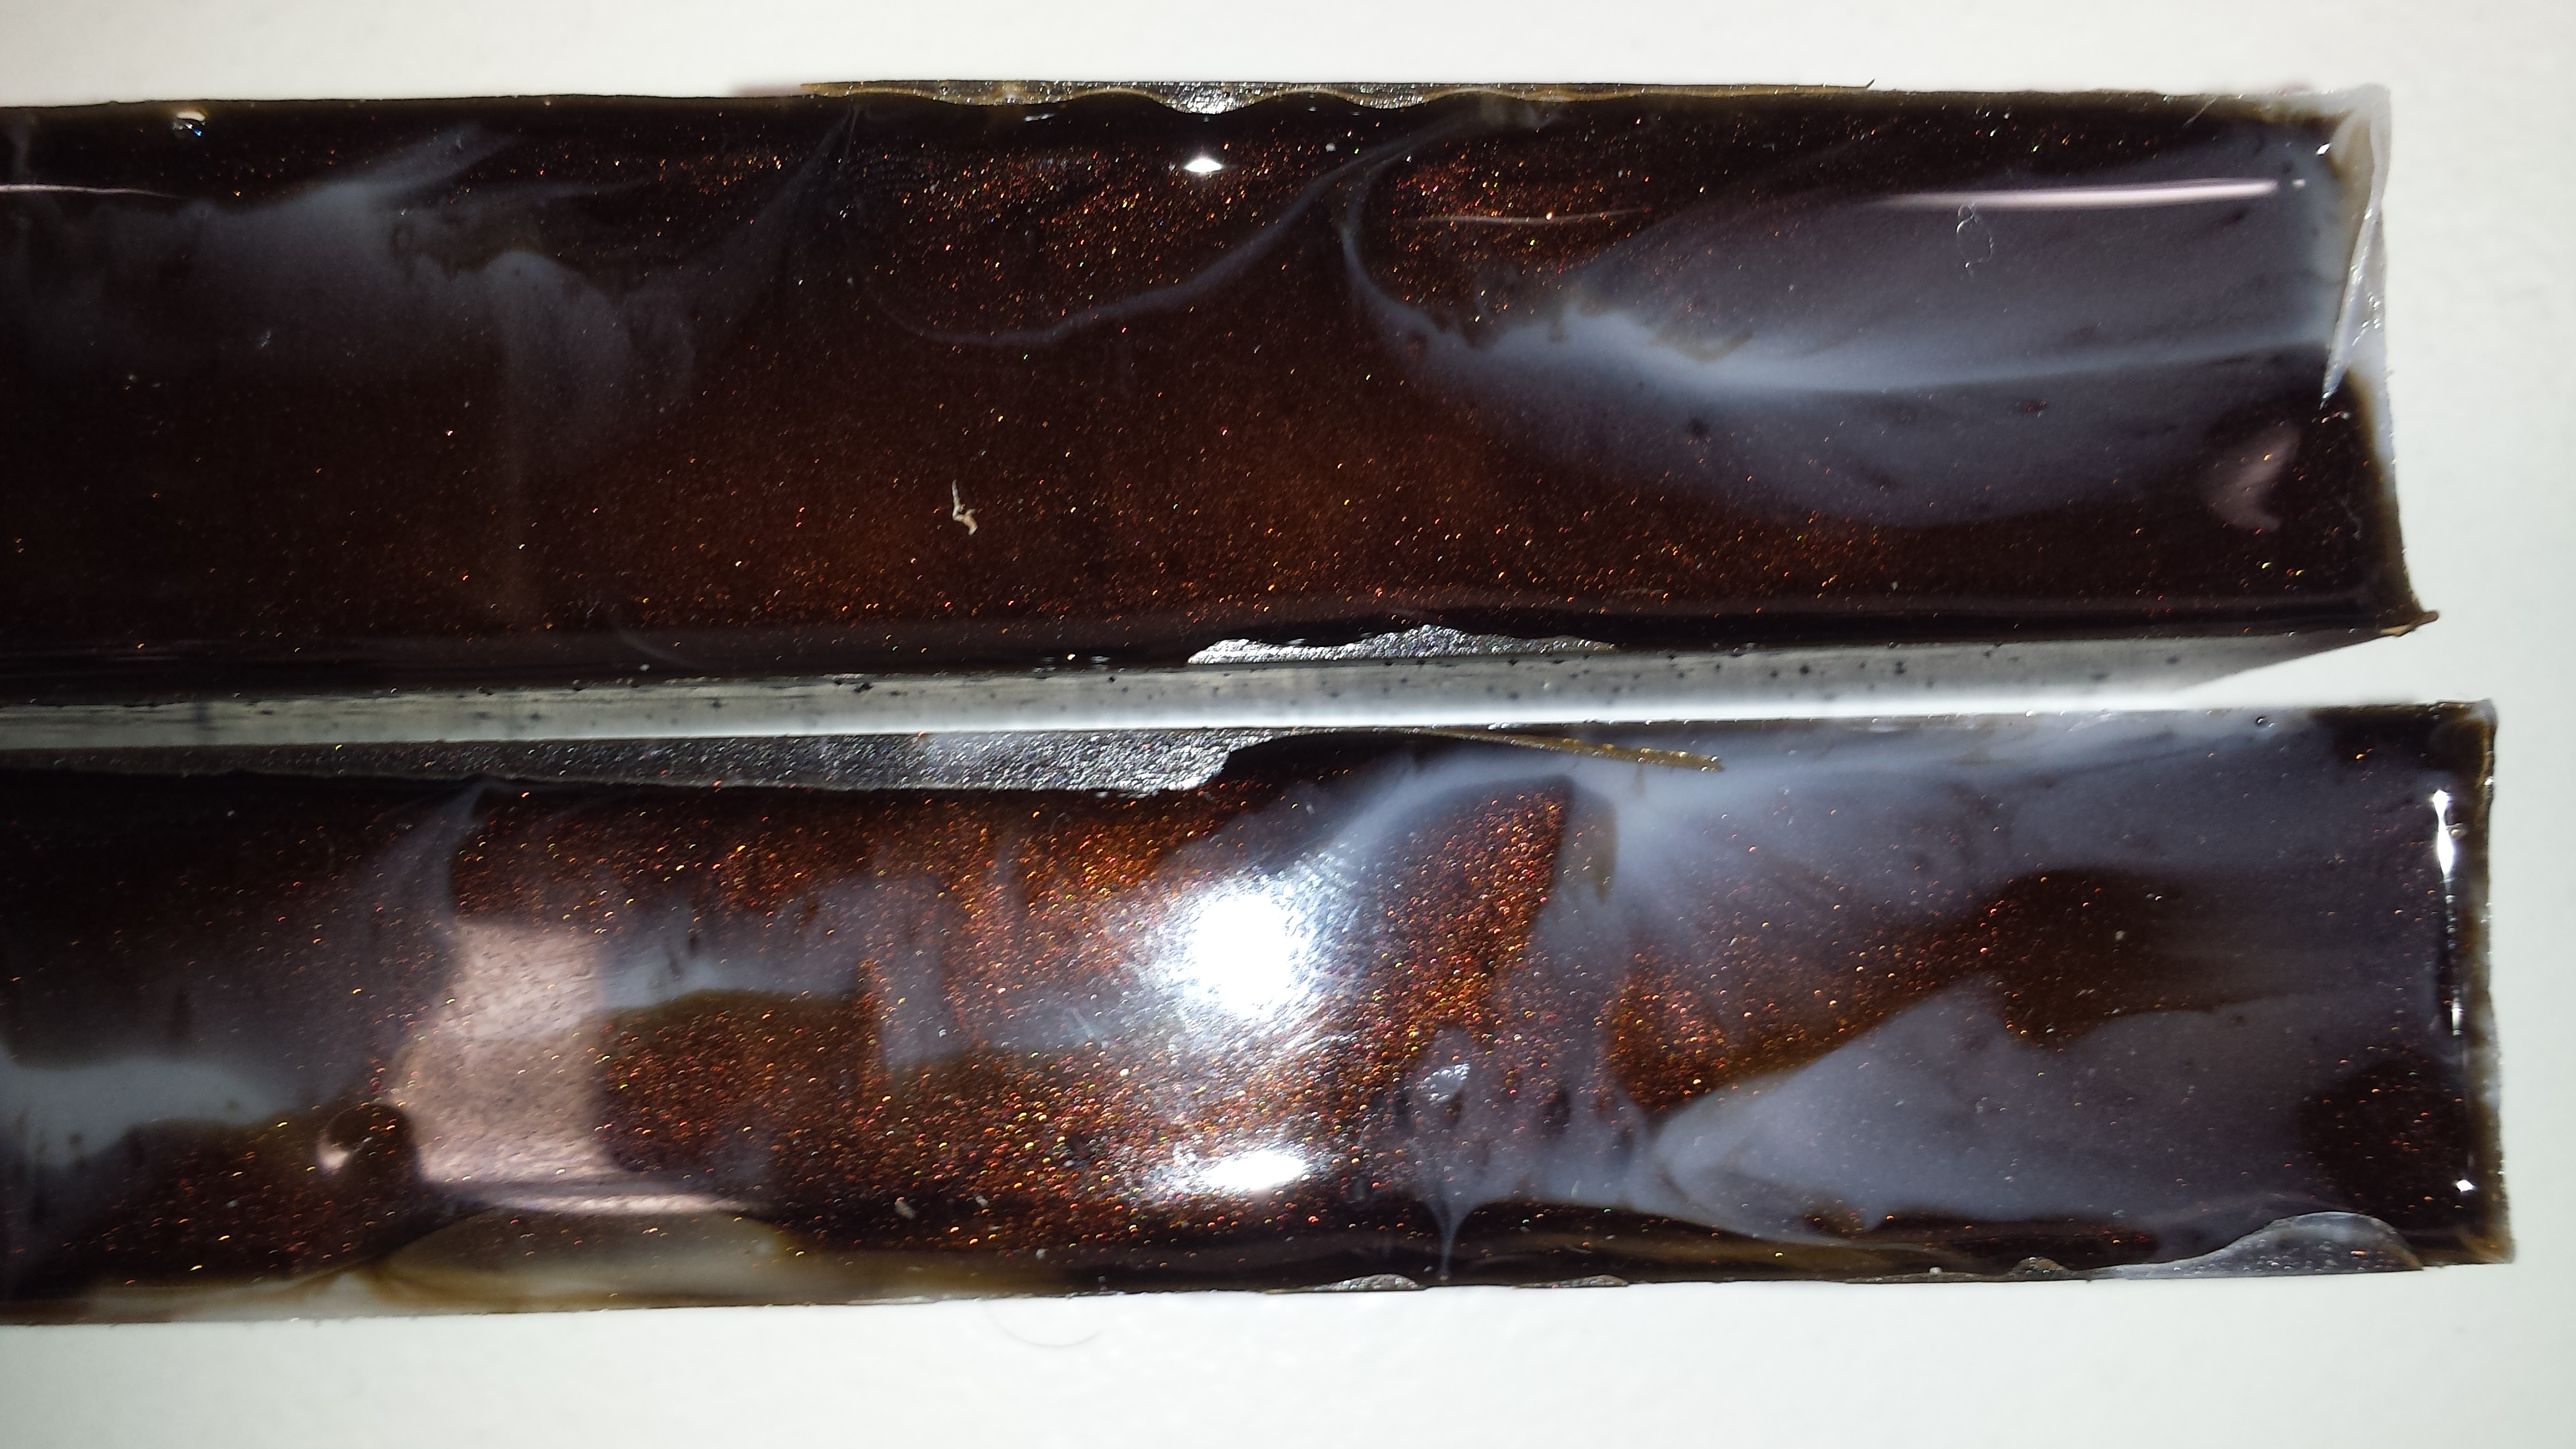
Today I’ll try for a coffee pen blank. I’m visualizing a dark brown blank with swirls of cream.
Setup:
I poured two sets of 55g each “A” & “B” this time. I added my colors to the part “A” component. One “A” part received five drops of Alumilite White. The other, five drops of Alumilite Brown and a small scoop of Antique Copper Pearl Ex. I alternately poured each color into the mold. I started with white and poured along the blank’s axis in each cavity. After completing the pour I pressurized the pot for one hour. This time I made sure to level the board in the pressure pot.
Demold:
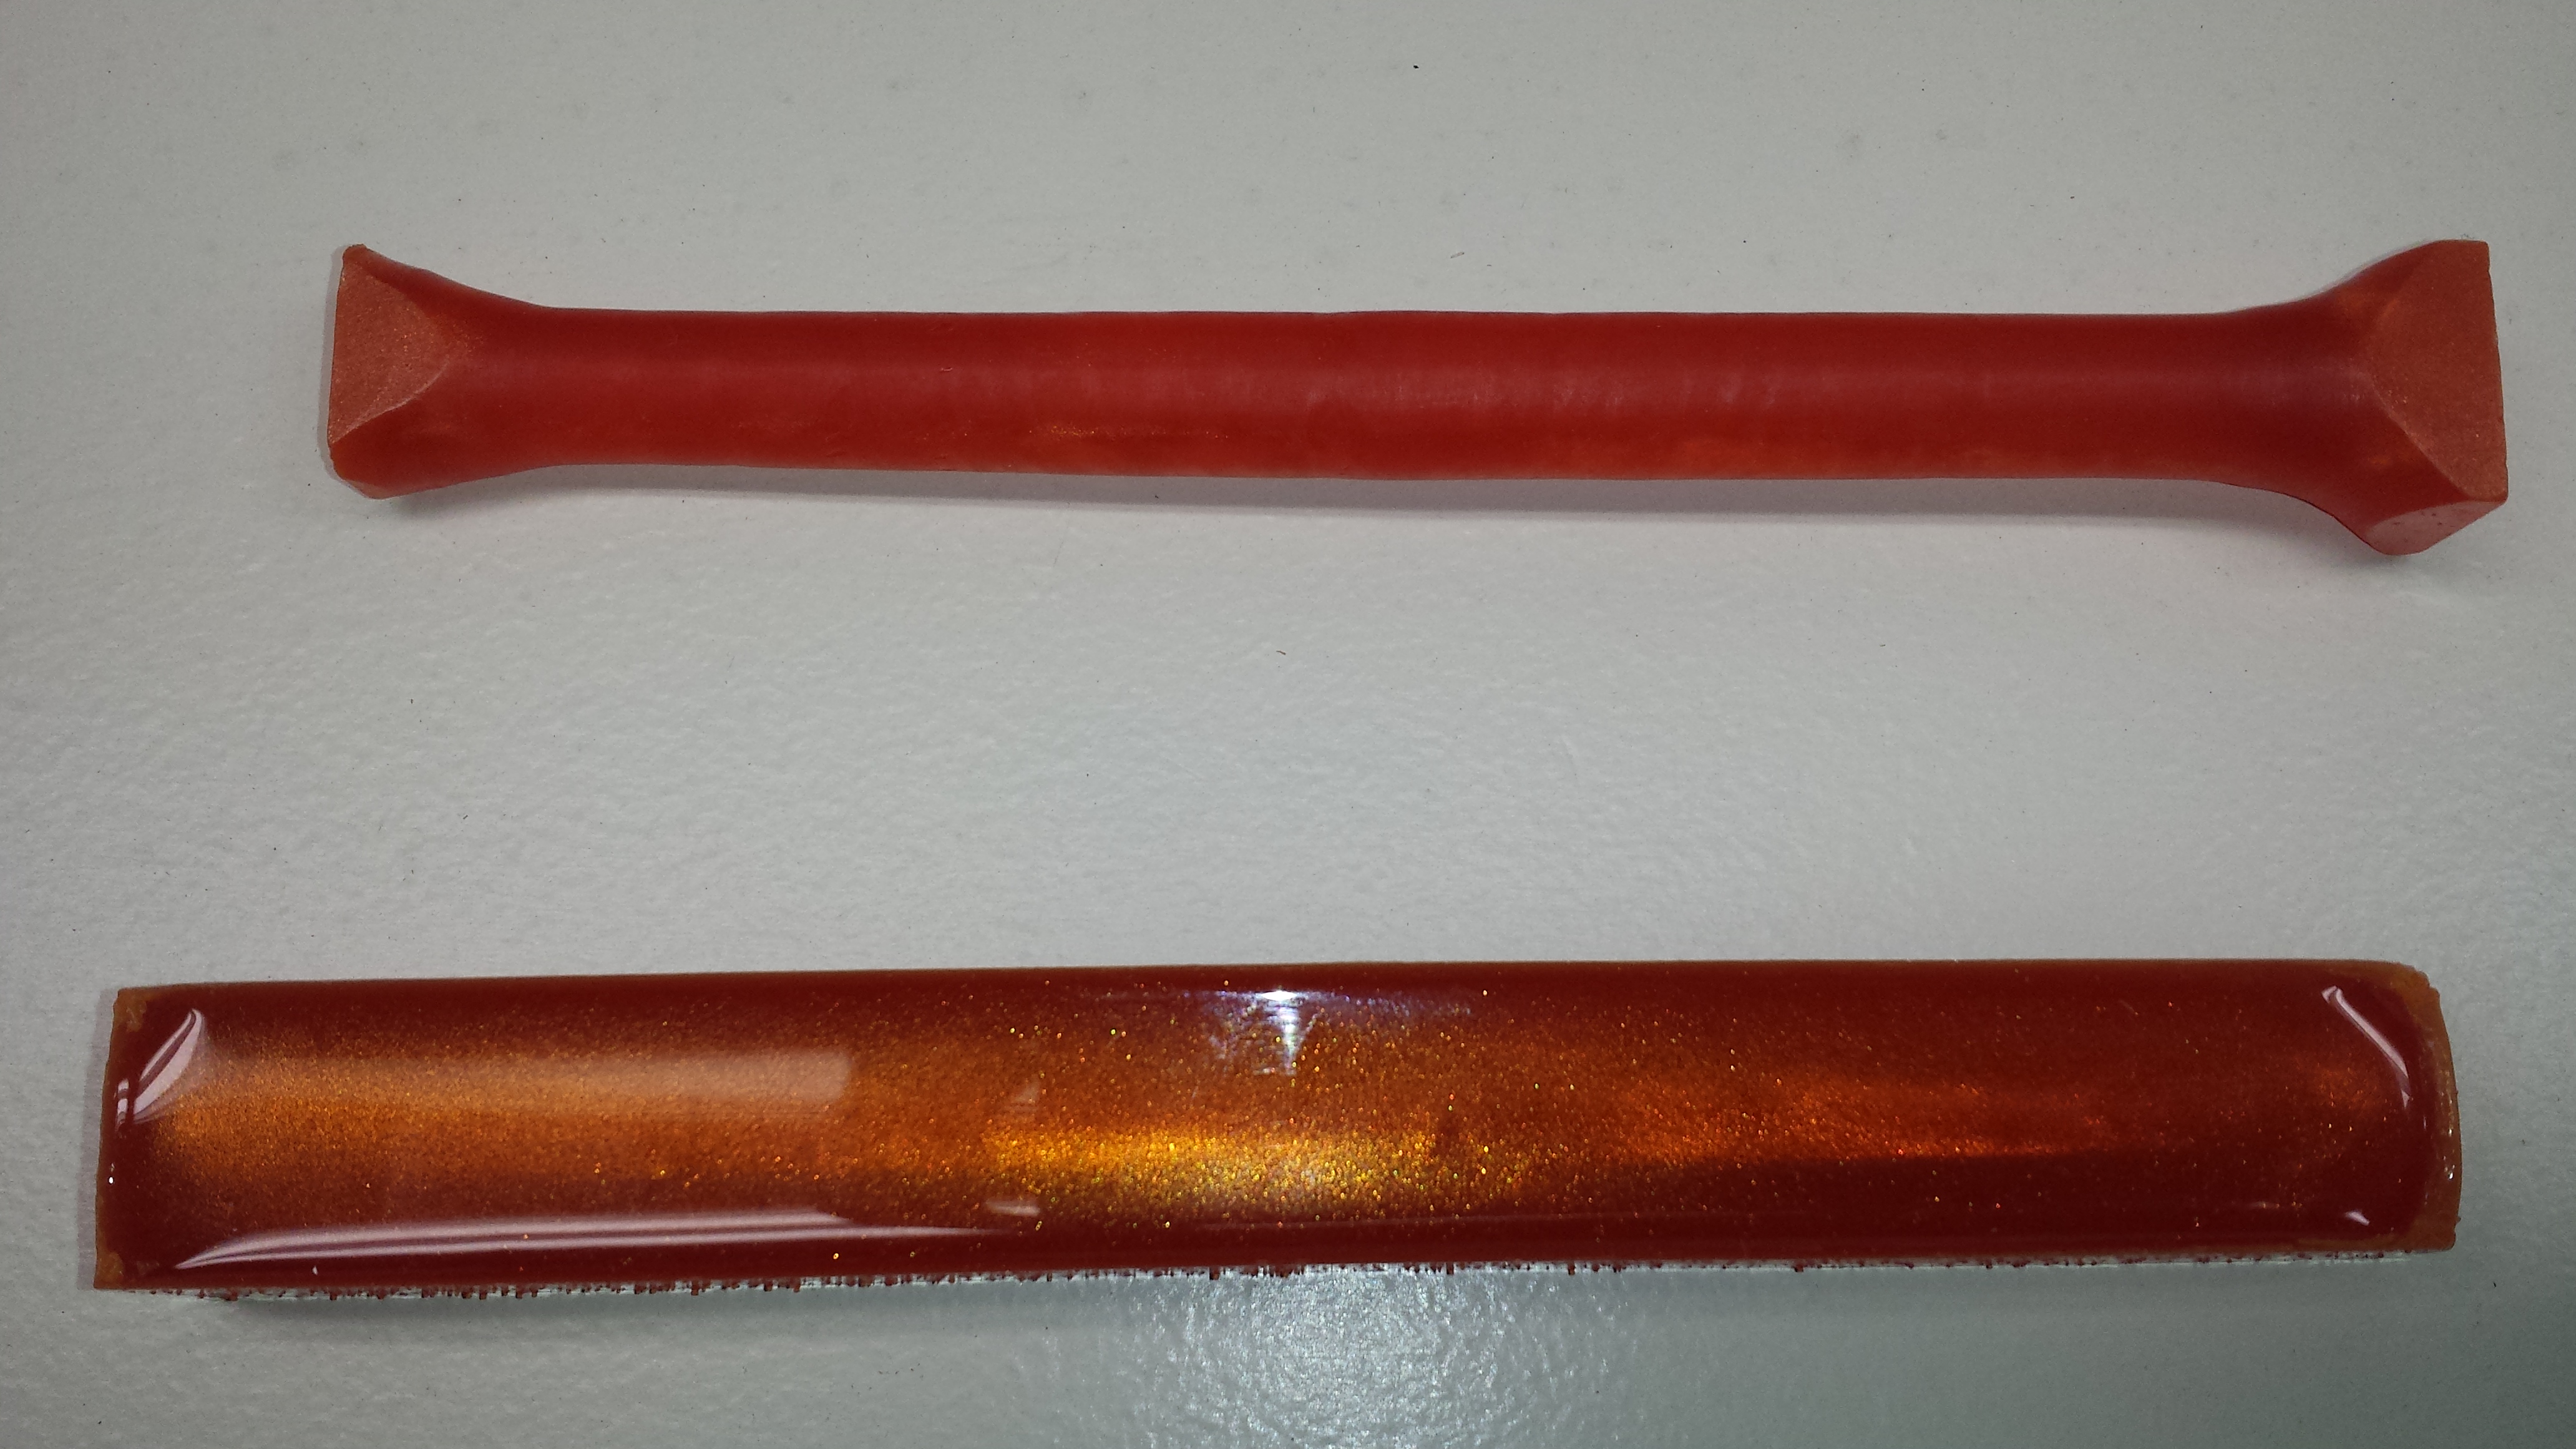
Demolded blank. You can clearly see where the mold contained small bubbles in the silicone.Looks more like Root Beer Float
There was no problem removing the pen blank from the mold. My previous pen blanks were still flexible after I removed them from the mold. To find a solution I looked at the Alumilite FAQ. The manufacturer recommends post curing. I found the information on the Casting tab, under the question “It has been 4 hours and my clear resin is still flexible, will it harden?“. Following their advice, I allowed the blank to cure in the toaster oven at 160 degrees for an additional two hours. This resulted in a blank with zero flex when trying to bend it by hand.
Observations:
My coffee pen blank turned out more like a root beer float.
I should have mixed 110 g of resin total, instead of 110 g of each color. Since I mixed so much, half of the resin hardened in the cup. I didn’t have an additional mold ready to pour the excess into.
Pouring white resin into brown does not result in a mocha like color swirl. I’ll have to mix brown and white to make a more beige color. I’ve learned that the colored resins don’t mix without agitating them.
This is my first attempt and creating a resin pen blank. Samara helped with the concept for these pen blanks. She wanted to combine gold for her and orange for Asher.
Setup:
I mixed 51 grams of each “A” & “B” part of Amazing Clear Cast resin. We added three drops of Alumilite Orange dye and one scoop Solar Gold Pearl Ex powder to the “A” side of the resin before mixing with part “B”. 102 grams of resin was not enough to fill both cavities of the mold that I made.
First pen blank
Demold:
The pen blanks came out of the mold easily although I could tell immediately that they were not quite what I expected. I’m encouraged by the look of the top surface. Once polished it might make a nice pen. The side of the blank is rough however, showing little bumps where there were surface bubbles in the mold. I decided to round out one to see what a pen might look like. The resin still needed days to cure and I found that there was significant flex in the resin. I could actually bend the blanks by hand. This pour drove home the lesson that demold time is not the same as cure time. I knew the pen blanks would need to cure but had thought the resin would be harder after the demold time elapsed.
Observations:
I did not level the board holding the mold in the pressure pot and one end of the pen blank ended up 3/4″ while the other is only 1/2″. Since I was unable to degas the silicone, the mold has tiny bubbles along sides. I made the mold out of Alumilite High Strength 3 which should have set without bubbles. I think air must have clung to the HDPE blocks I used to form the blank cavities. The bottom of the mold lacks dimensional stability. Being maybe a 1/4″ thick the blanks cast in it tend to have a slight curve on the bottom, conforming to whatever it’s sitting on.